FlytBase
FeaturesSupportHomeNew Releases
  • Introduction to FlytBase
    • What is FlytBase?
    • FlytBase Advantage
  • Getting started with your FlytBase Account
    • Creating a FlytBase Profile
    • Creating an Organization
    • Joining an Organization
    • Managing Your Organization
    • Roles and Permissions
    • Site Management
    • Setup Private Cloud Storage (AWS S3)
  • Navigating FlytBase
    • Navigating Your FlytBase Platform
  • MAPS AND OVERLAYS
    • Maps on FlytBase
    • Map Overlays
  • Device Management
    • DJI Dock 3 + FlytBase – The Future of Autonomous Ops Starts Here
    • Add and Setup Your Device
      • Register Your DJI Dock 3
      • Register Your DJI Dock 1 and 2
      • Register Your Hextronics Docks
    • Activating Device Subscription
    • Device Management
      • DJI Docks
        • Overview
        • Device Maintenance
        • Diagnostics
        • Device Logs
        • Firmware
        • Device Settings
          • Drone Control
          • Collision Avoidance Sensing (CAS)
      • Hextronics Docks
        • First Flight with Hextronics Atlas/Hextronics Universal
        • Overview
        • Diagnostics
        • Settings - Drone and Dock
        • Settings - Failsafes
        • Settings - Precision Landing
    • AirSense
  • Pre-Flight Modules
    • Learn More About Failsafes
      • Emergency Landing
      • Alternate Landing Location
      • DRC Visibility
    • Platform Settings
      • Preferences
      • Flight Configuration
      • Key Bindings
      • Checklist
      • Privacy
    • Planning
      • Mission Planning
        • Path Mission
        • Grid Mission
        • Importing a Mission using KML file
        • WPML Mission
        • Mission Breakpoint
      • Mission Management
      • Mission Scheduler
    • Zones
  • TERRAIN AND ALTITUDE VISUALIZATION
    • Terrain Visualization
      • Terrain Visualization for Missions
      • Terrain Visualization for Go To Location (GTL)
    • In-Flight Altitude Visualization
  • In-Flight Modules
    • Setting Up Your First Flight
    • Flight Execution
      • Go to Location (GTL)
    • Annotations
    • How to Manage Your Flight Operations
      • Fleet Management
      • How to Control Your Drone
        • Manual Drone Controls
        • Drone Access Control
      • Payload Controls
        • Manual Payload Controls
        • Payload Access Control
    • Video Wall
    • Audio Chat
    • Alerts and Notifications
    • Speaker and Spotlight
    • Live Mission Recorder
    • Guest Sharing with Maps
  • AVSS Parachute Integration
  • Post Flight Modules
    • Reviewing Your Flight Logs
    • Gallery
    • Reports
  • FLINKS AND FLOWS
    • Flinks
      • Flinks: Alarms
      • Flinks : Live Streaming
      • Flinks : Data Processing
        • Mapping Using DroneDeploy
        • Mapping Using Pix4D
        • Mapping Using Strayos
    • Flows
      • Flows : Alarms
      • Flows : Operational Notifications
  • Discover More
    • General FAQs
    • Contact Technical Support
Powered by GitBook
On this page

Was this helpful?

  1. In-Flight Modules

Live Mission Recorder

In this article, you'll learn how to use the live mission recording feature on the FlytBase dashboard to create precise and efficient missions using real-time flights.
PreviousSpeaker and SpotlightNextGuest Sharing with Maps

Last updated 3 months ago

Was this helpful?

The Live Mission Recorder on the FlytBase dashboard enables drone operators to create, manage, and record detailed missions. This feature allows operators to use Go To Location (GTL) or manual controls to record different waypoints with their respective actions. It's ideal for tasks where you need to create precise and efficient missions using real-time flights, such as inspections or surveillance missions.

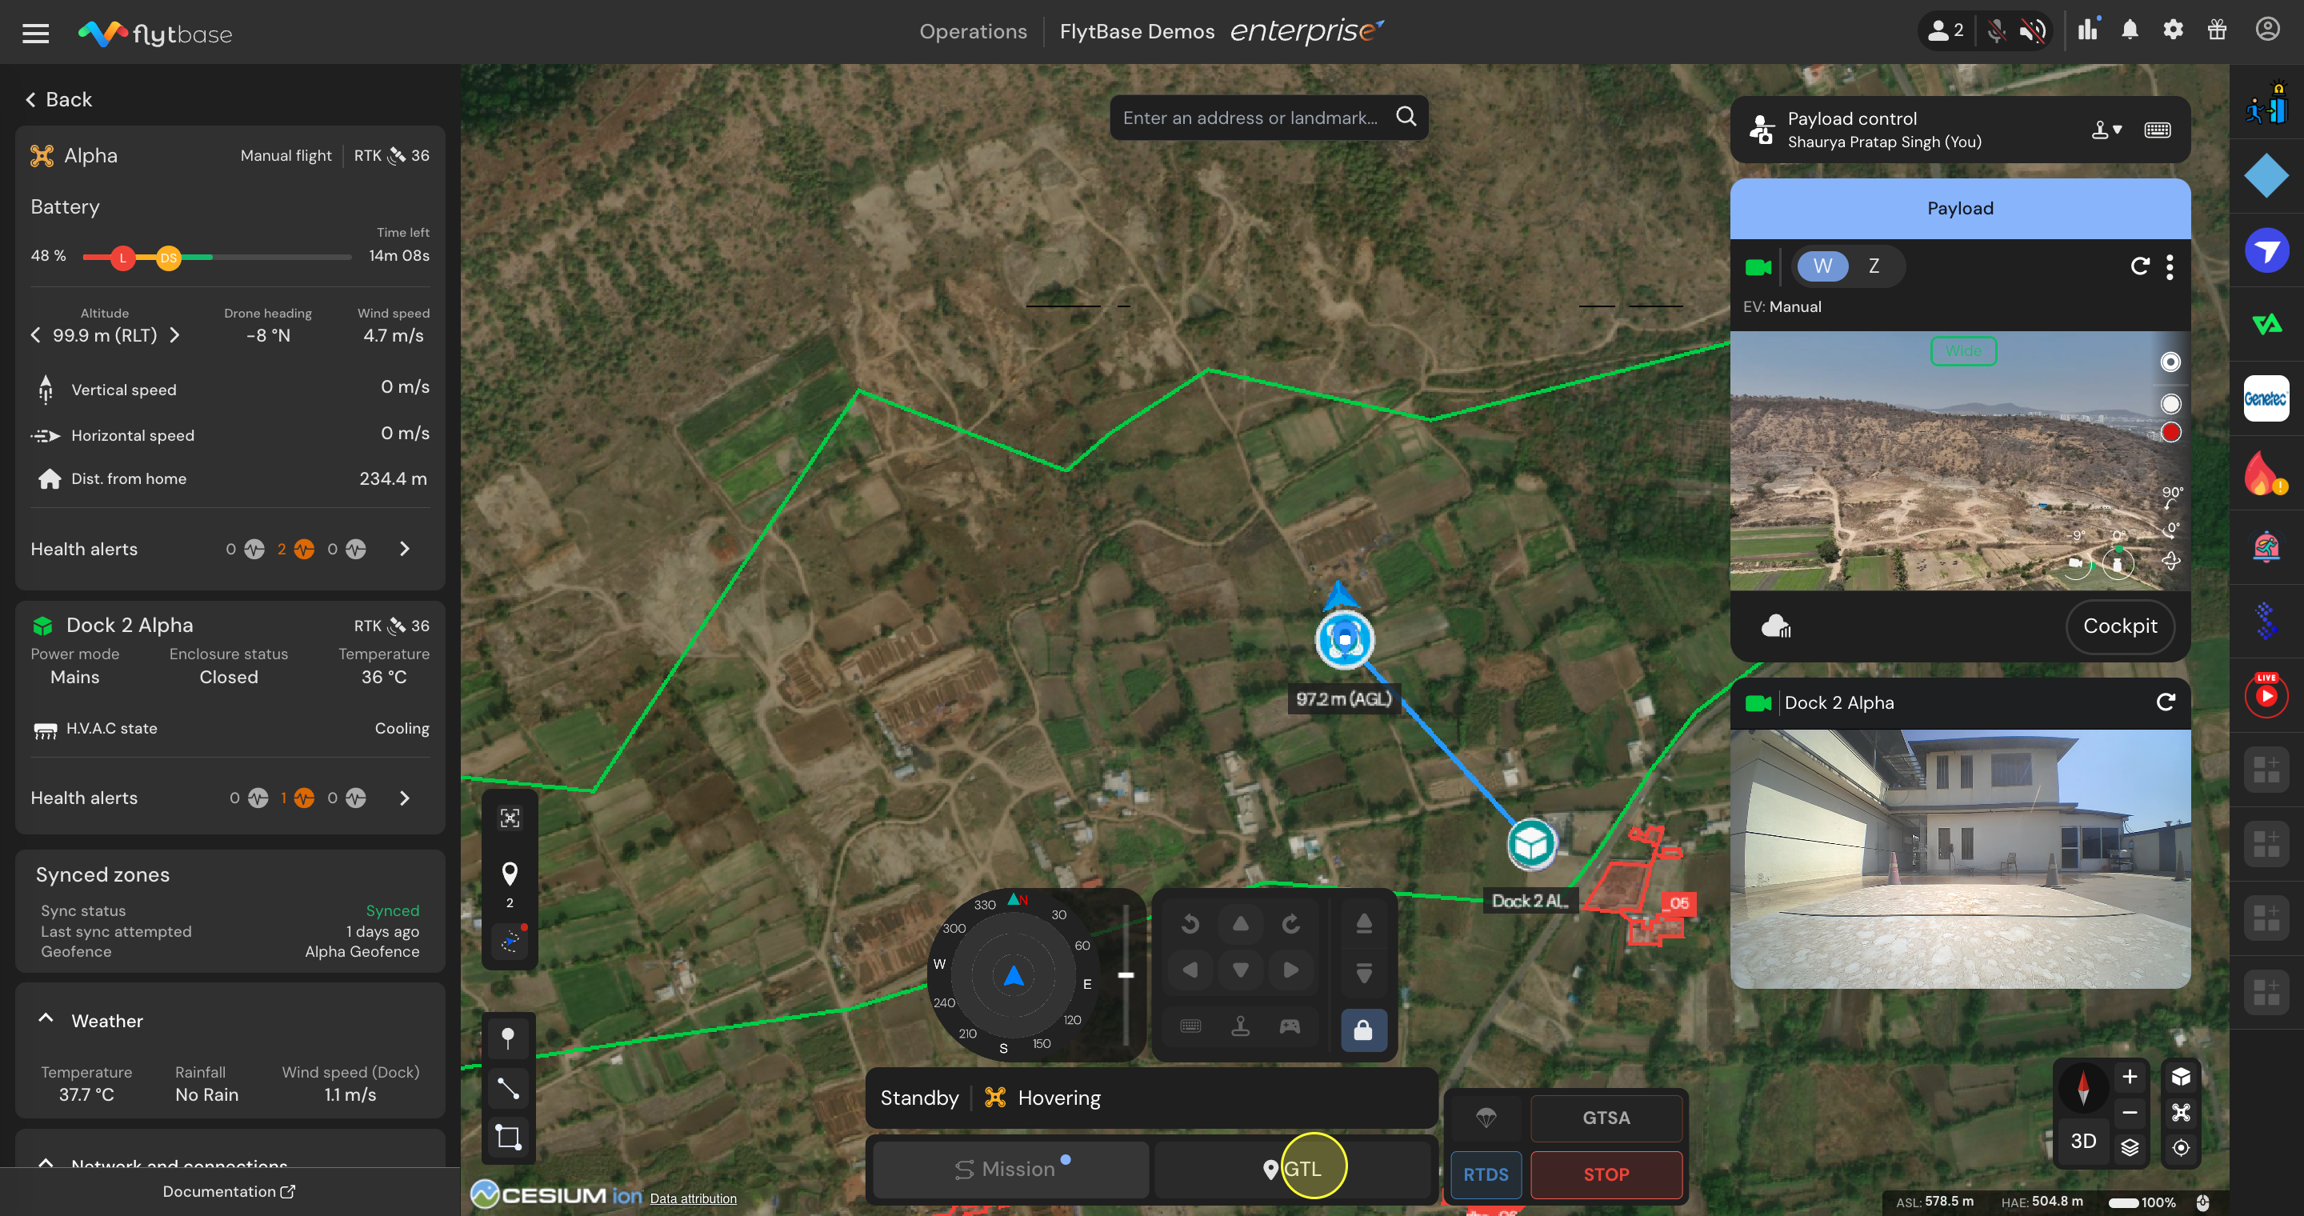
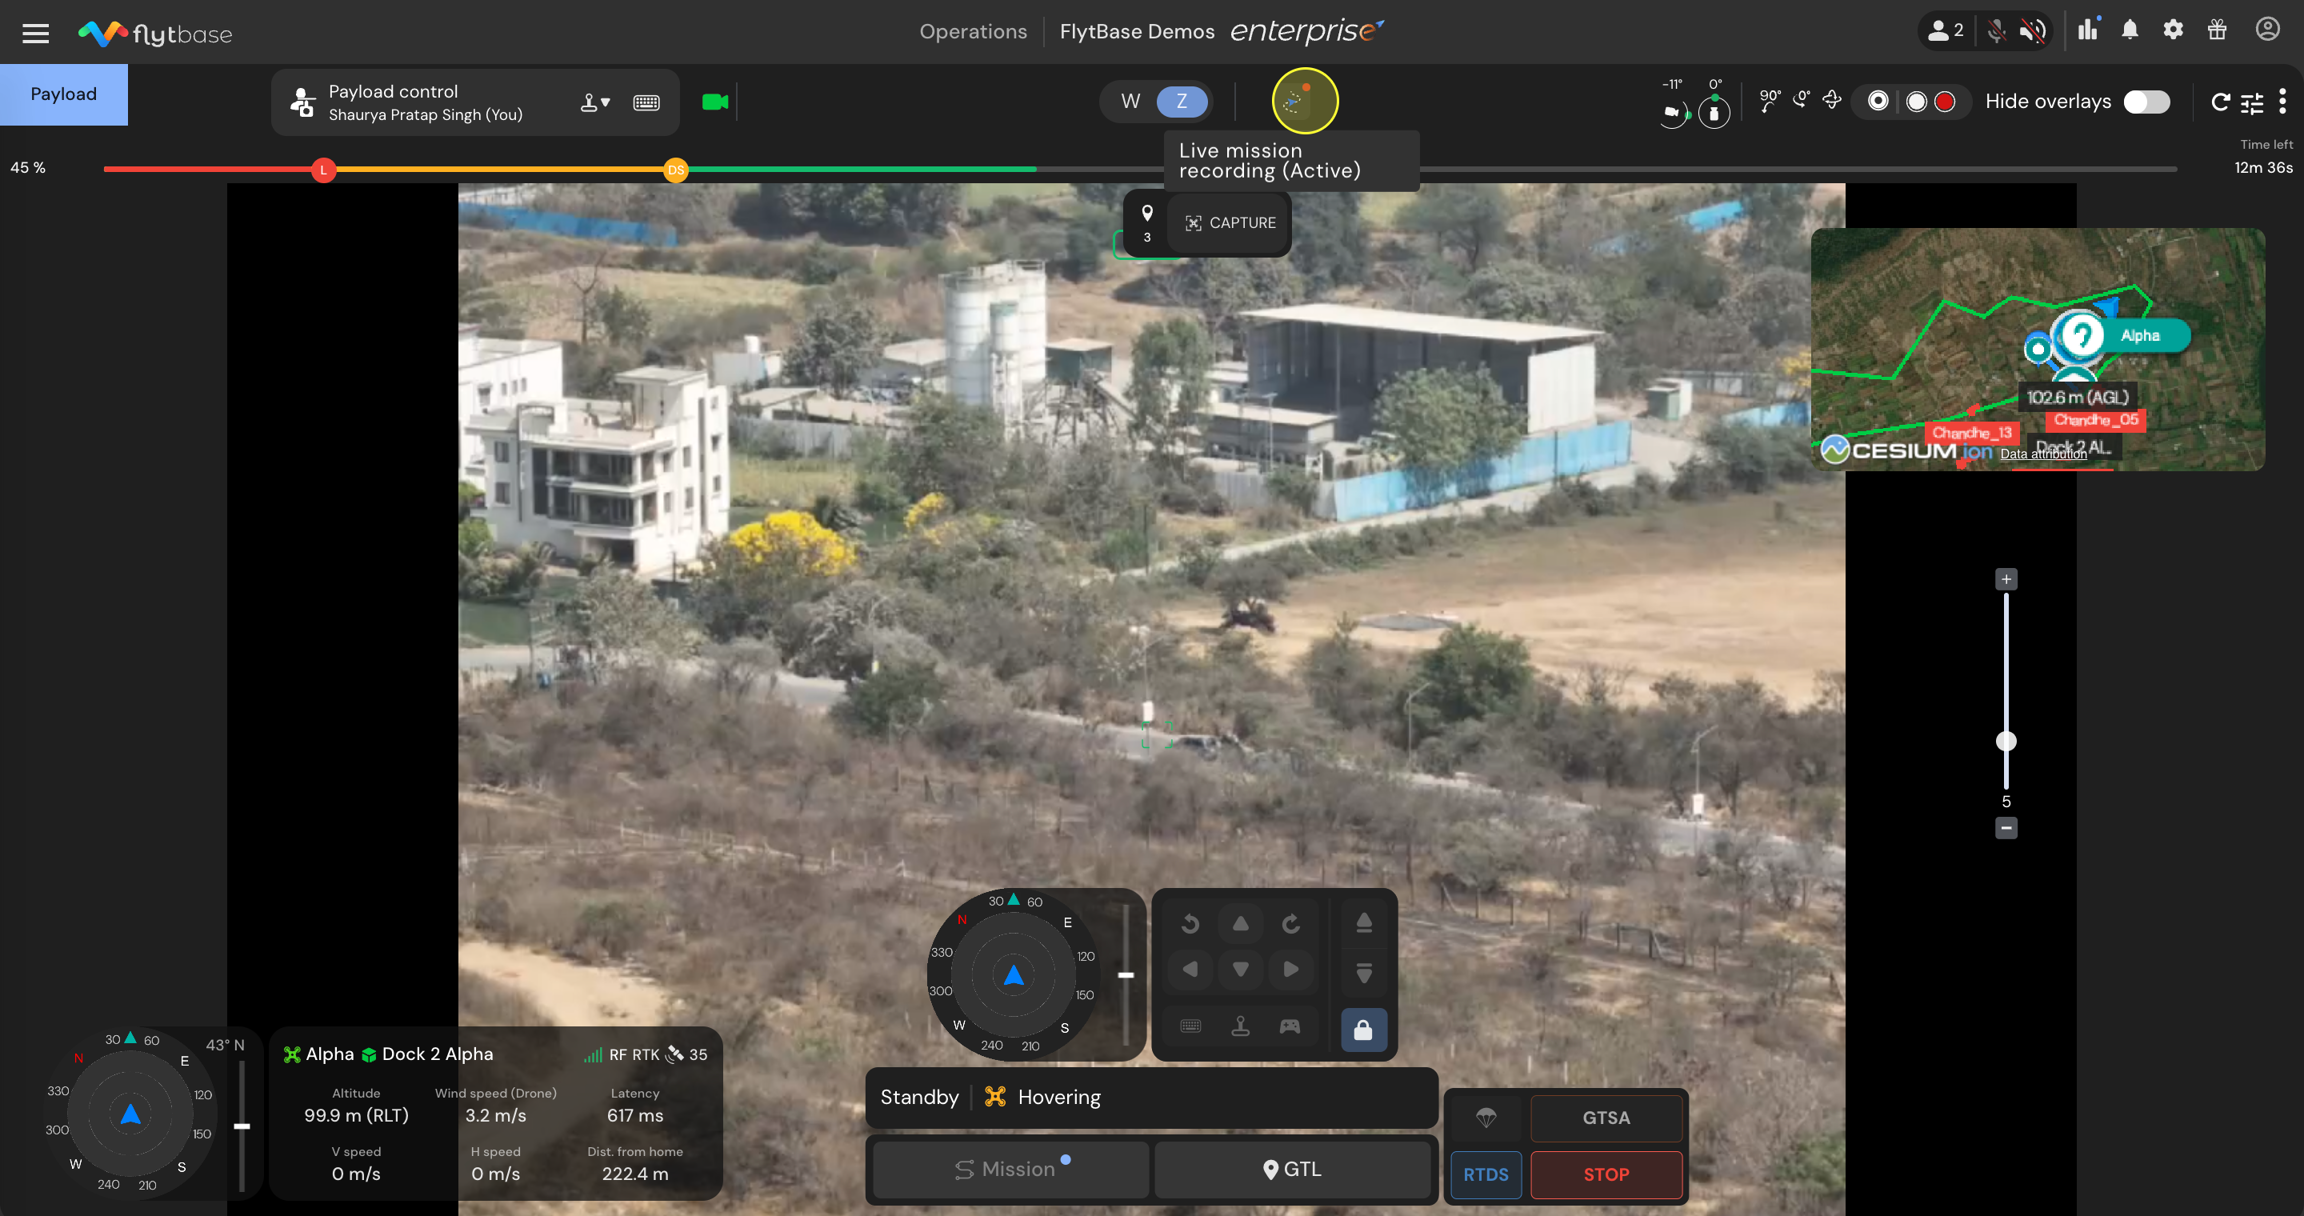
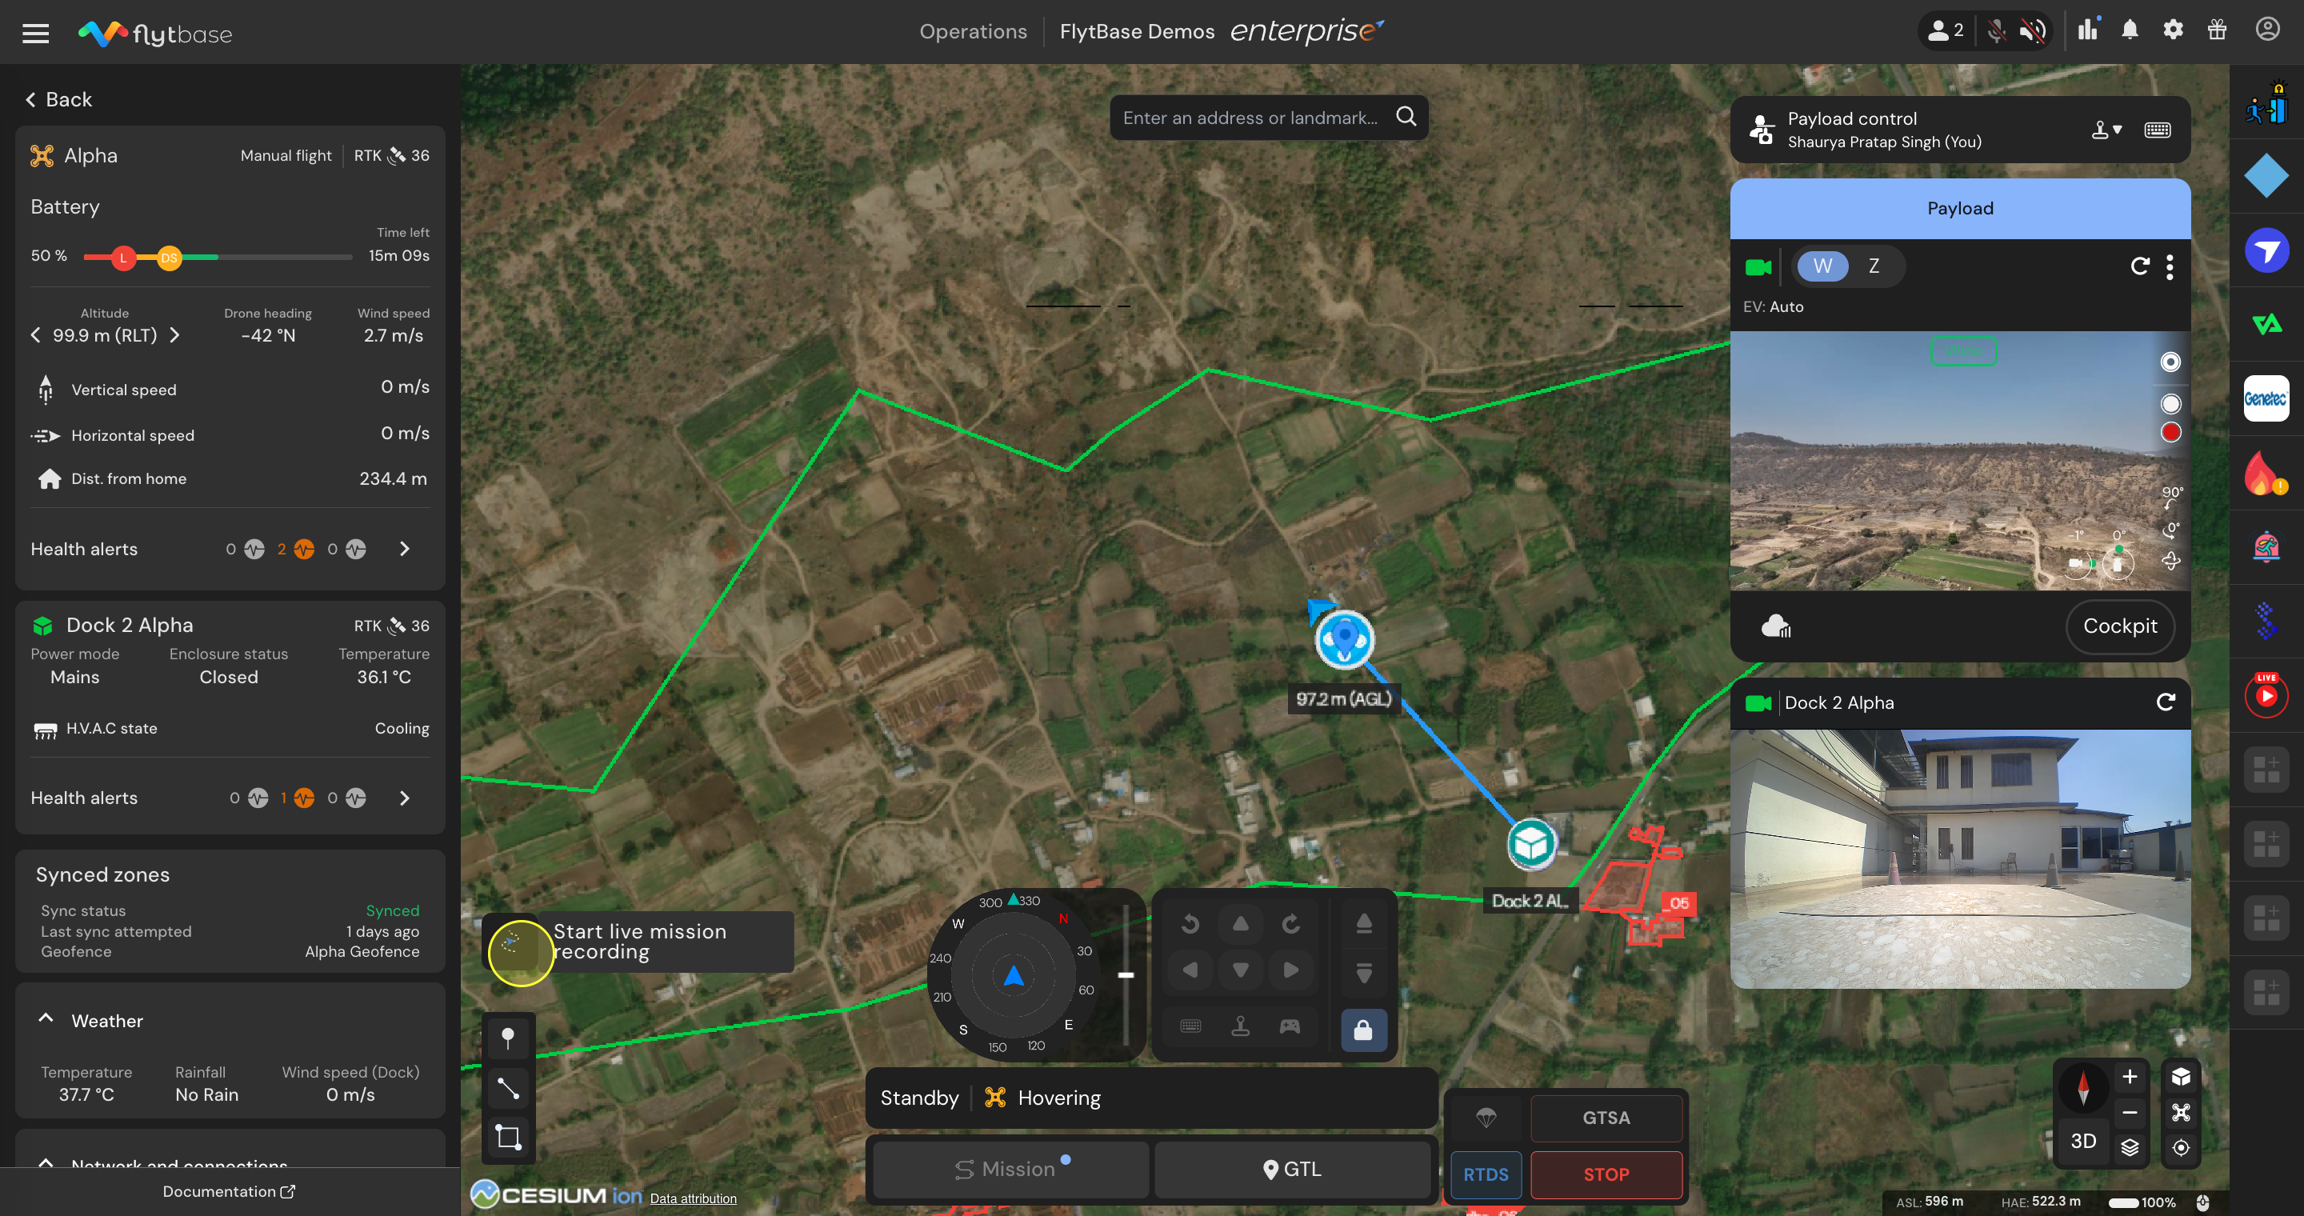
  • Navigate to the FlytBase dashboard and use the Go to location feature. Once the drone has reached the initial point at which you would like to start capturing waypoints, you can do so by clicking the Start live mission recording button in the fleet or cockpit view.

Initialising the live mission recording in fleet view
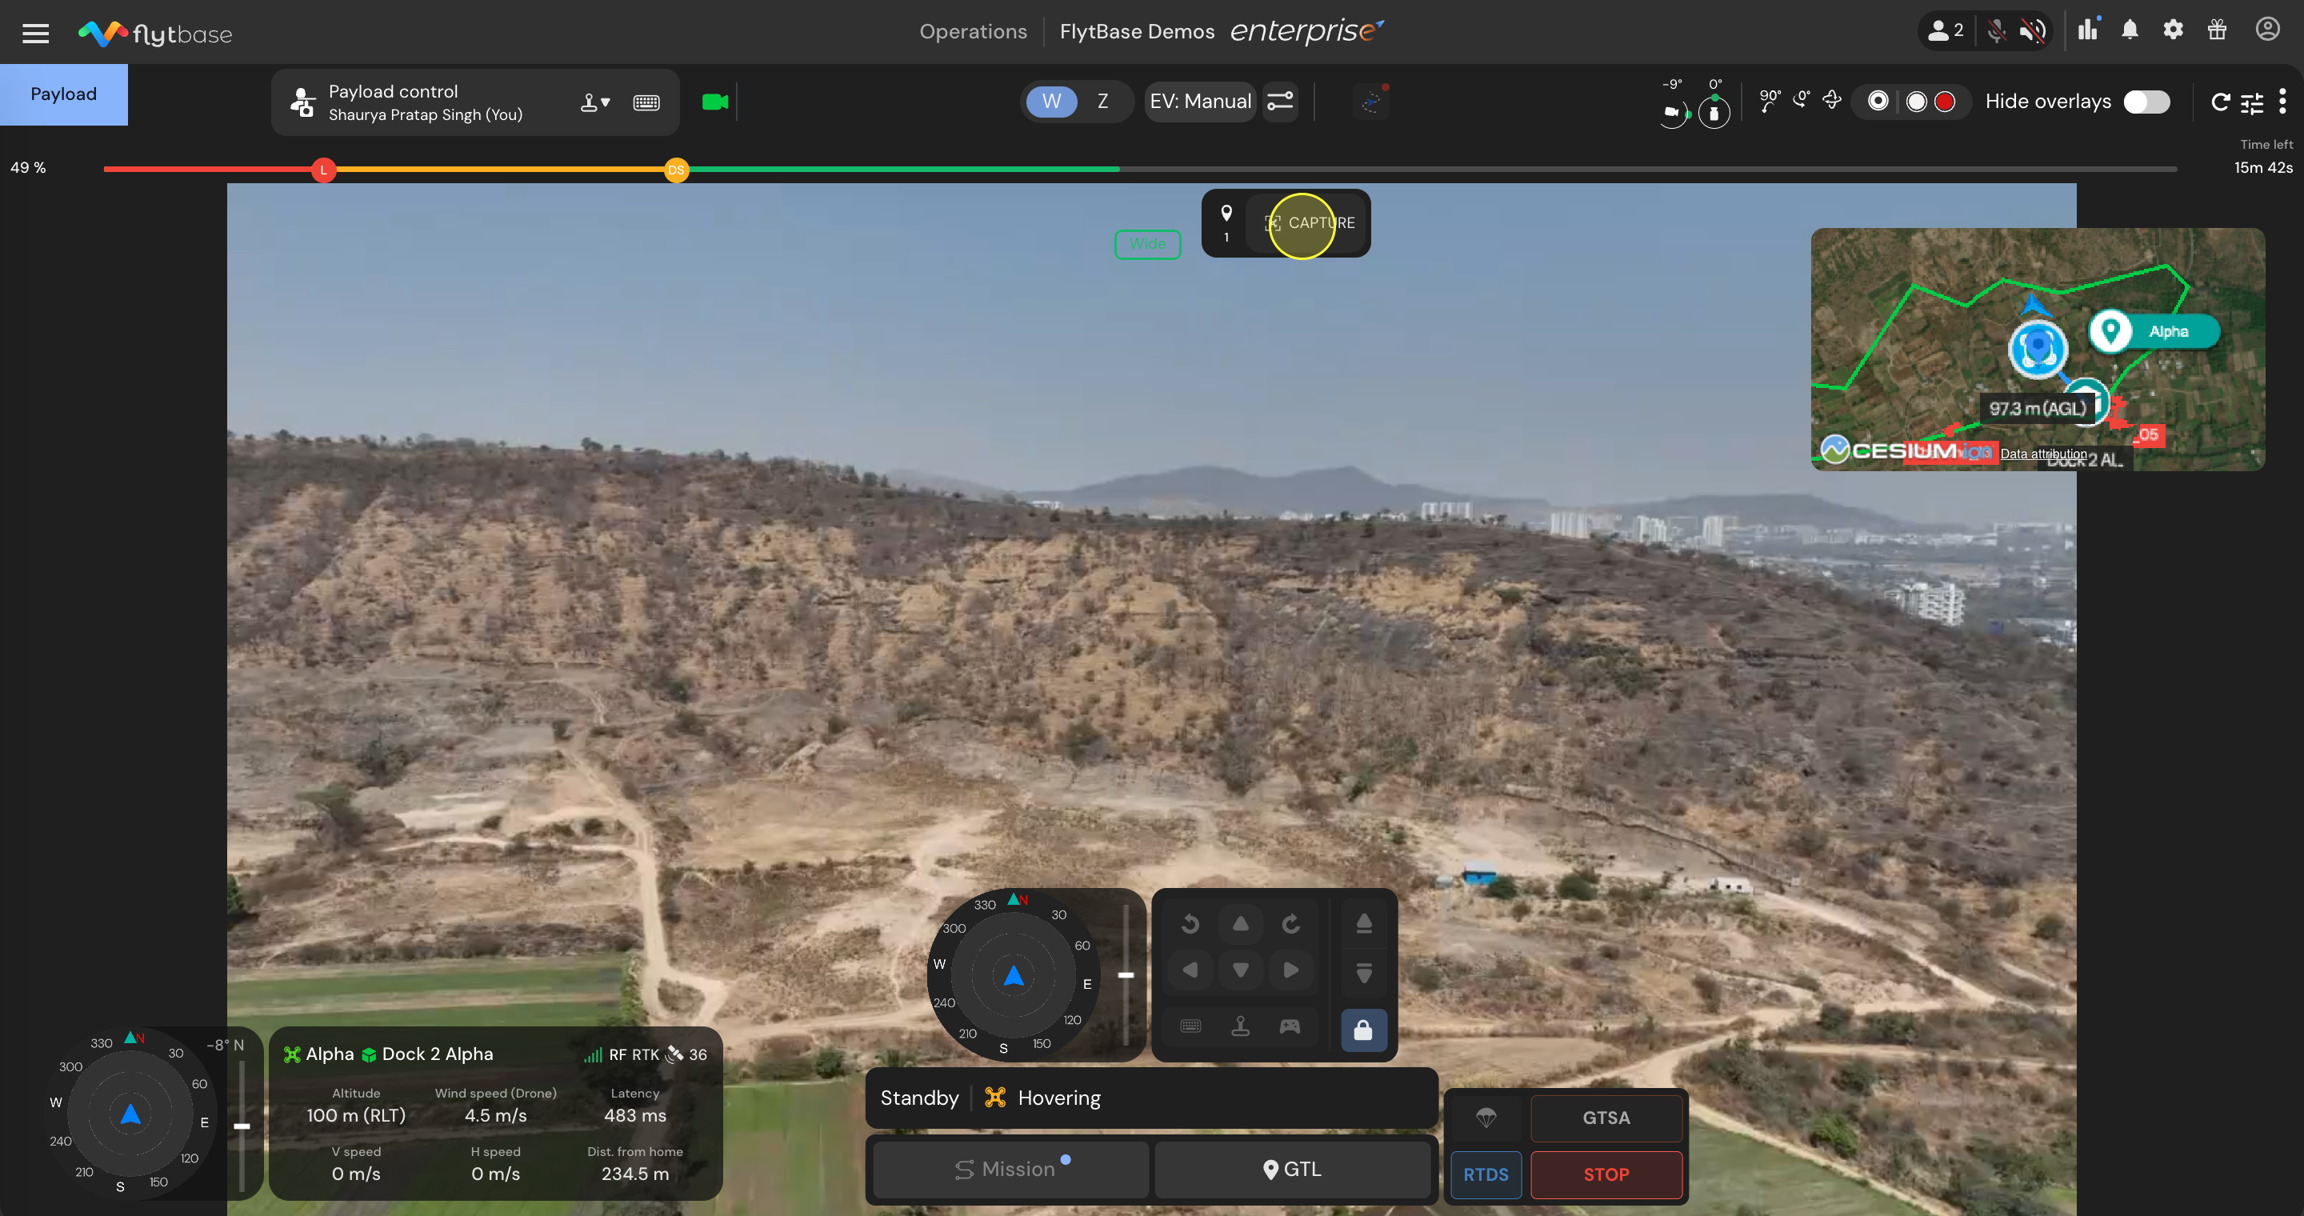
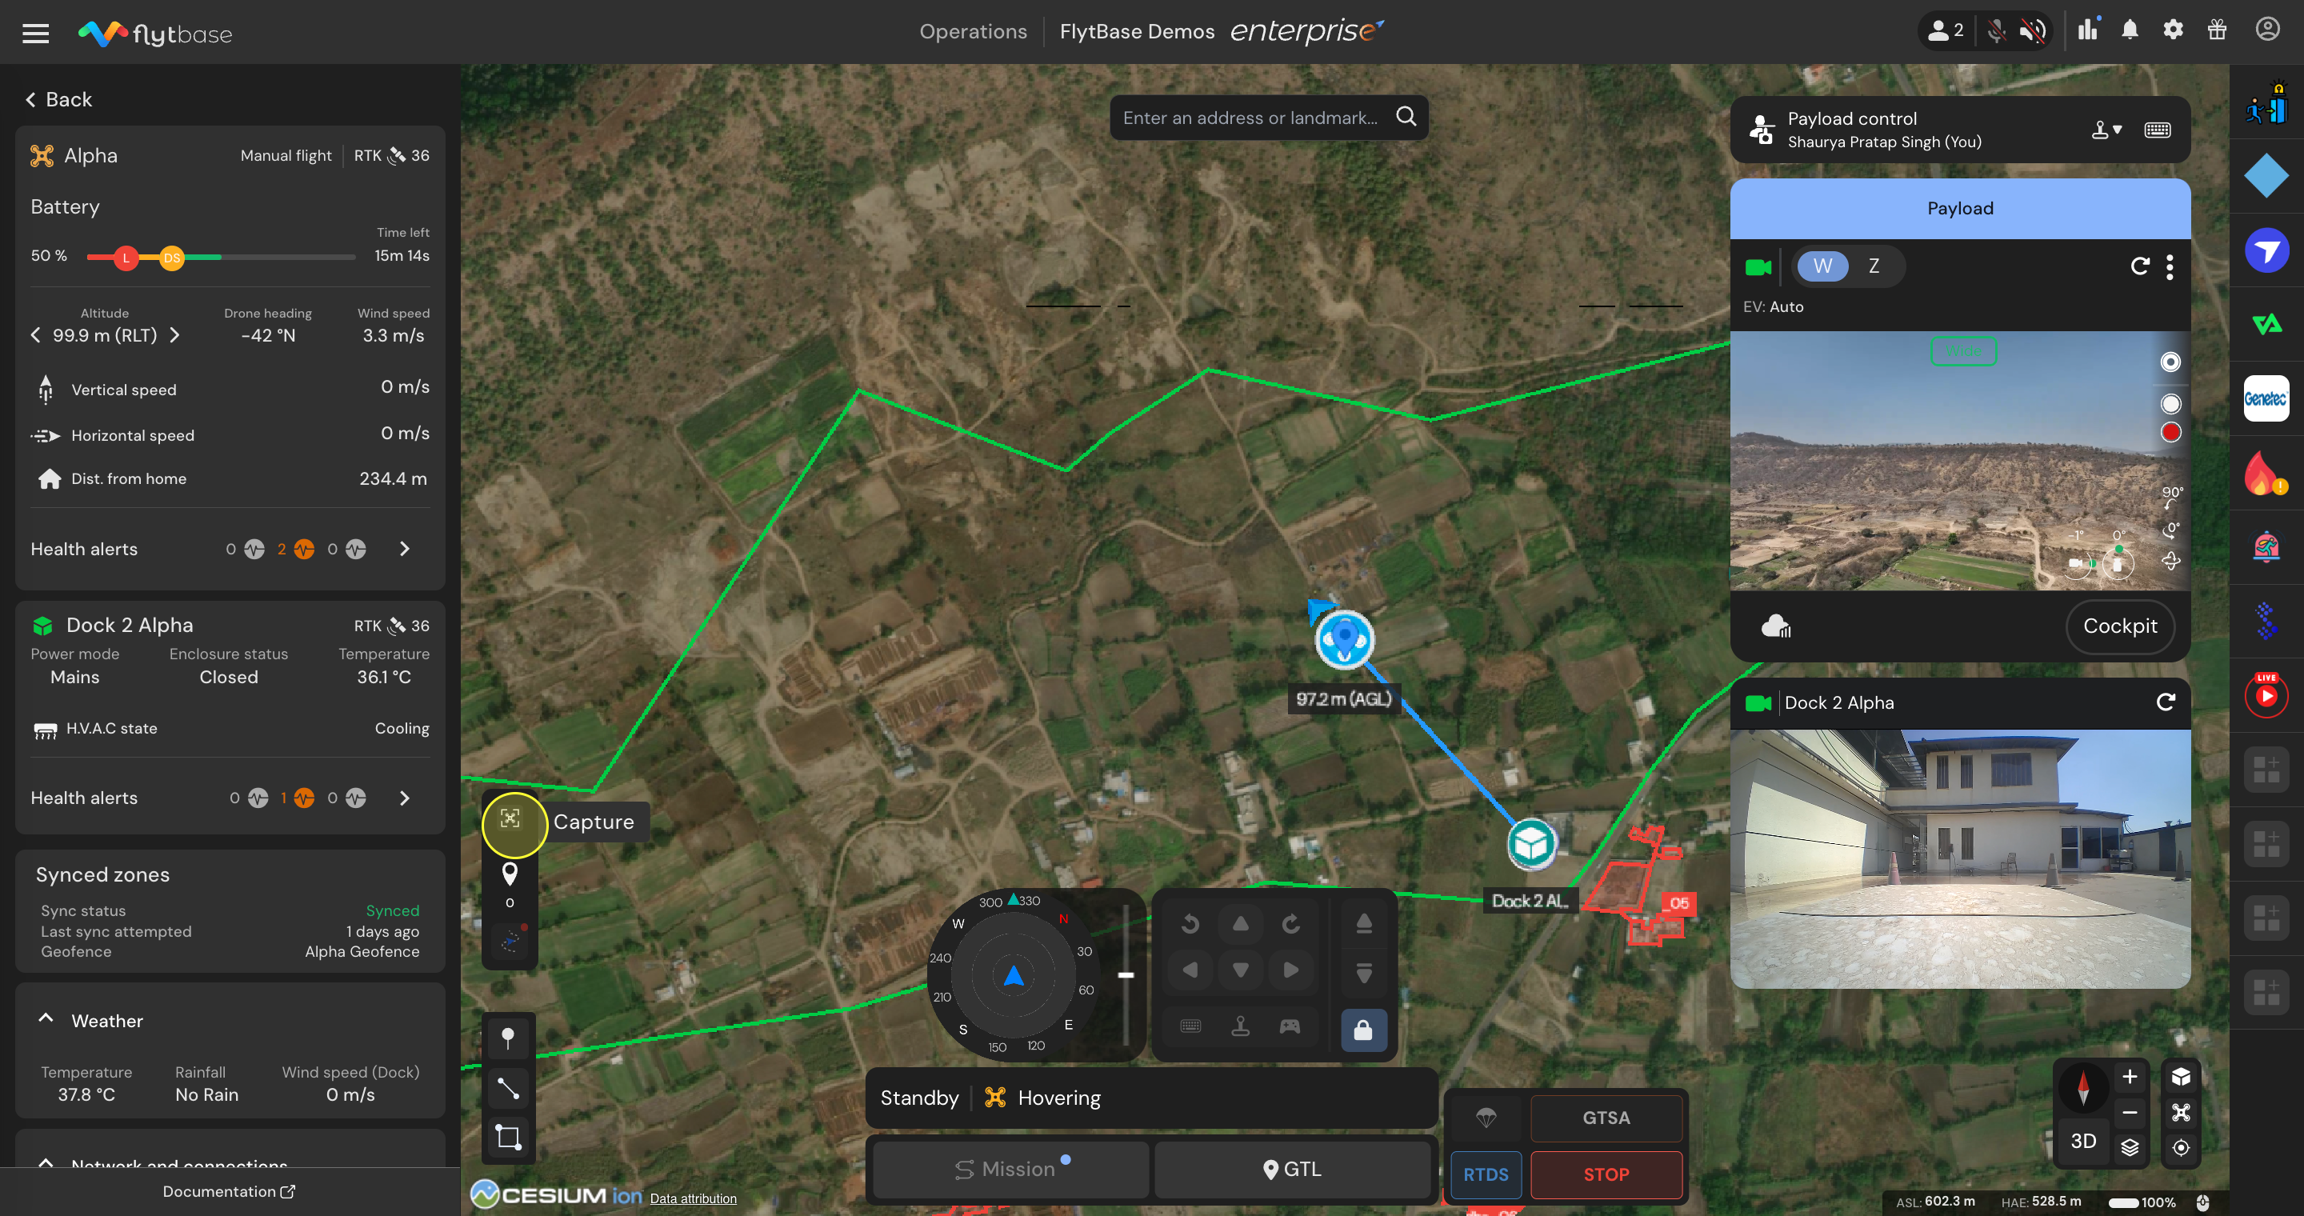
  • Click on the Capture button. This action will capture the waypoint along with the current set of gimbal parameters.

  • Adjust the gimbal's position or camera settings if needed and capture the respective recorded actions again. This can be done in the cockpit view as well. This sequence of actions will be saved for that particular waypoint.

Remember, for the live mission recording feature to work, you need at least two waypoints in your mission.

  • Record another waypoint by giving another Go To Location (GTL) command or by manually flying the drone to the next waypoint where you want to record the drone's parameters.

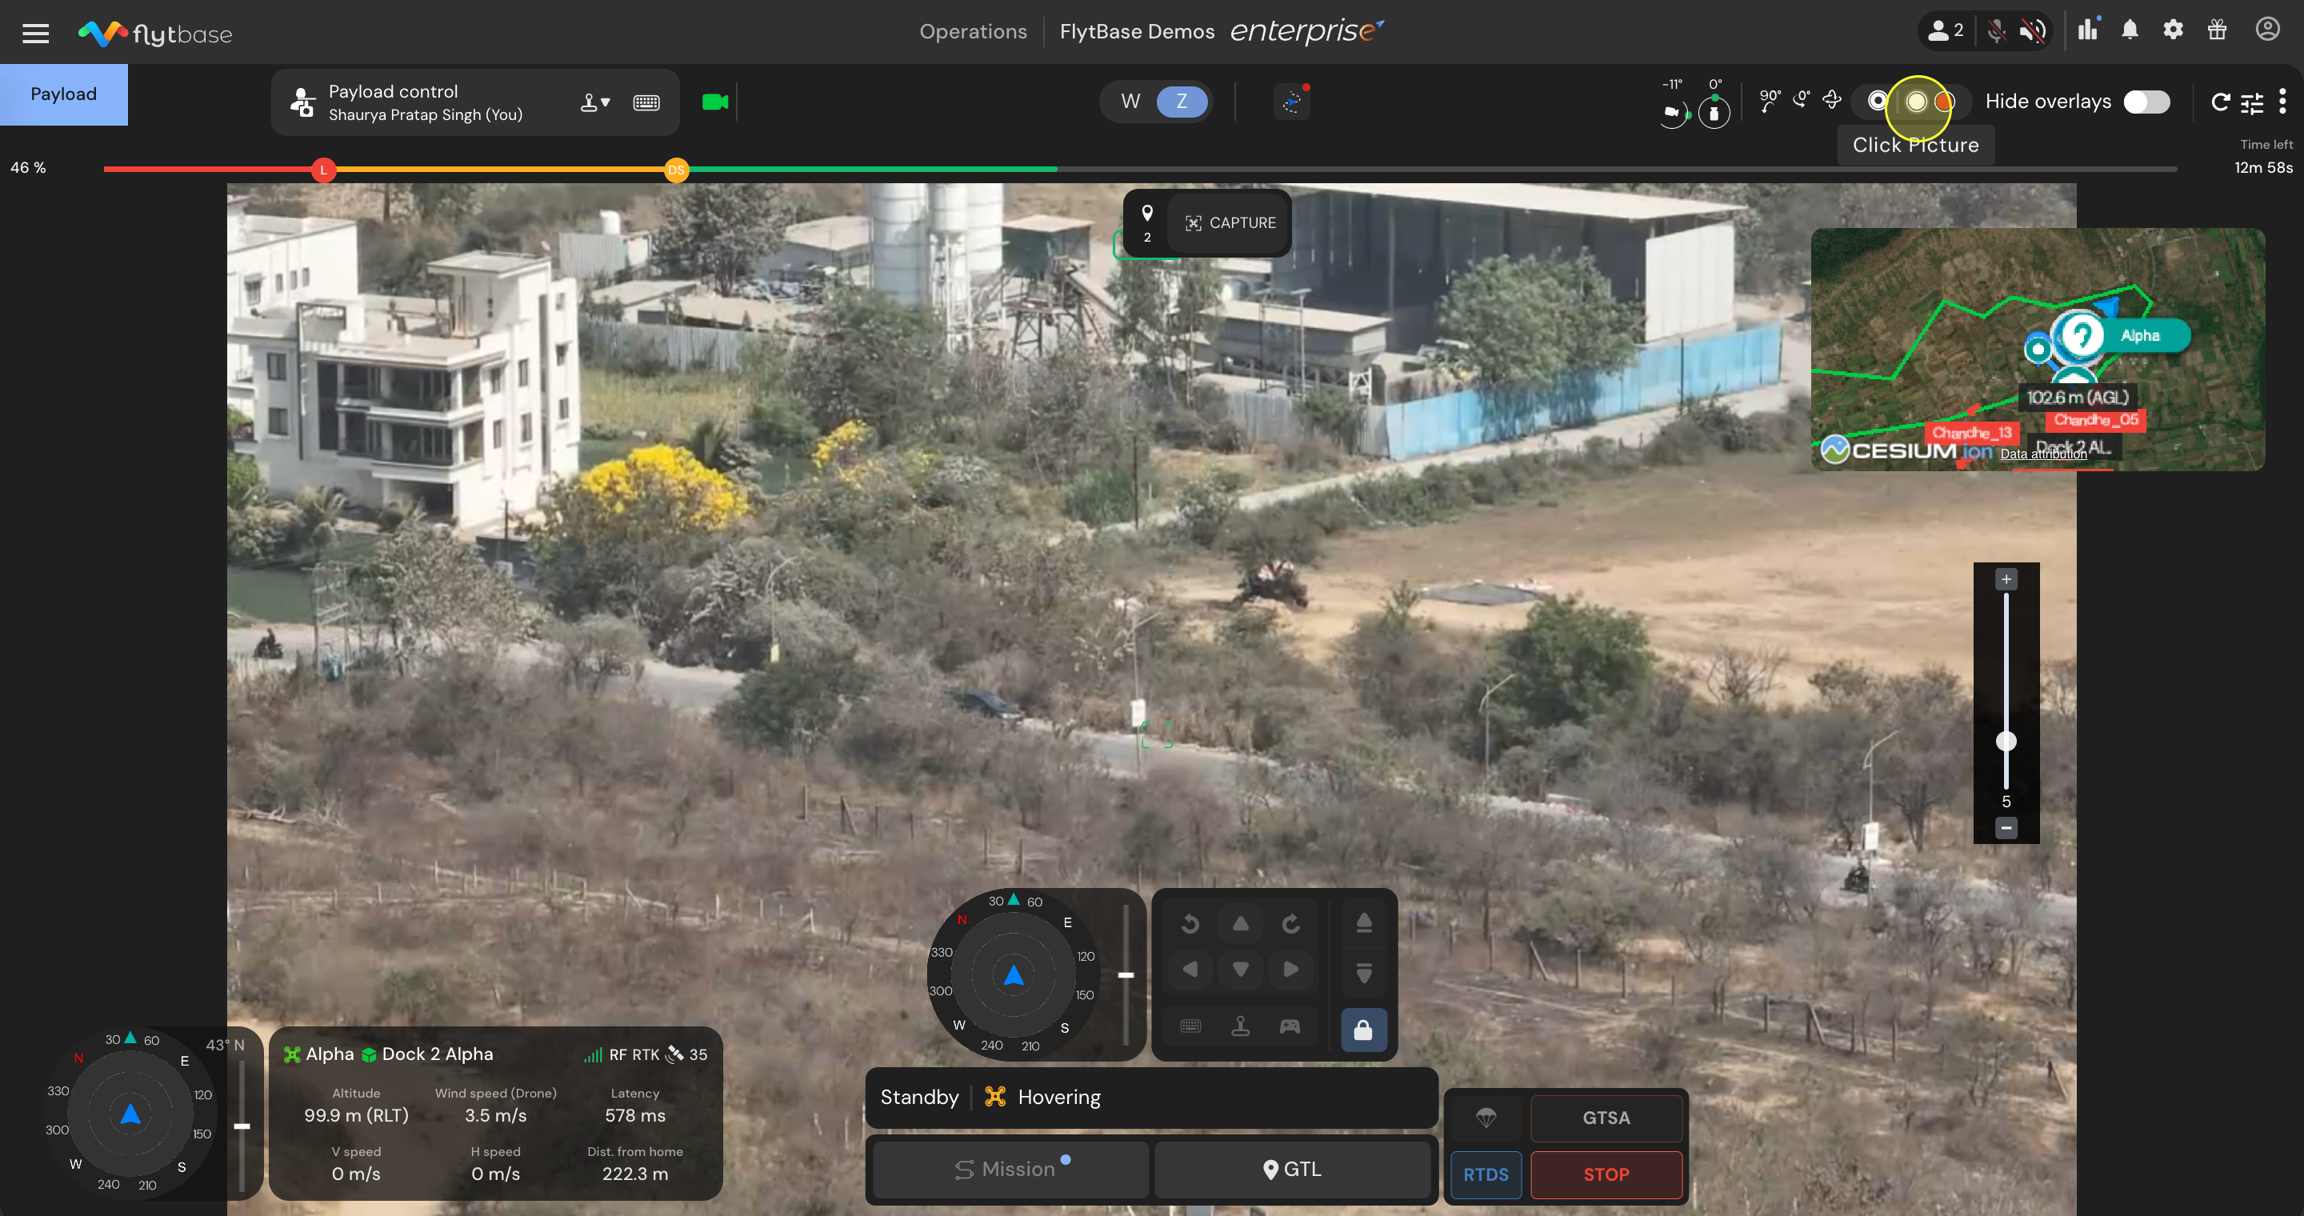
  • Additionally you can capture a photo at this particular waypoint. This action will also be recorded as a waypoint action under your mission.

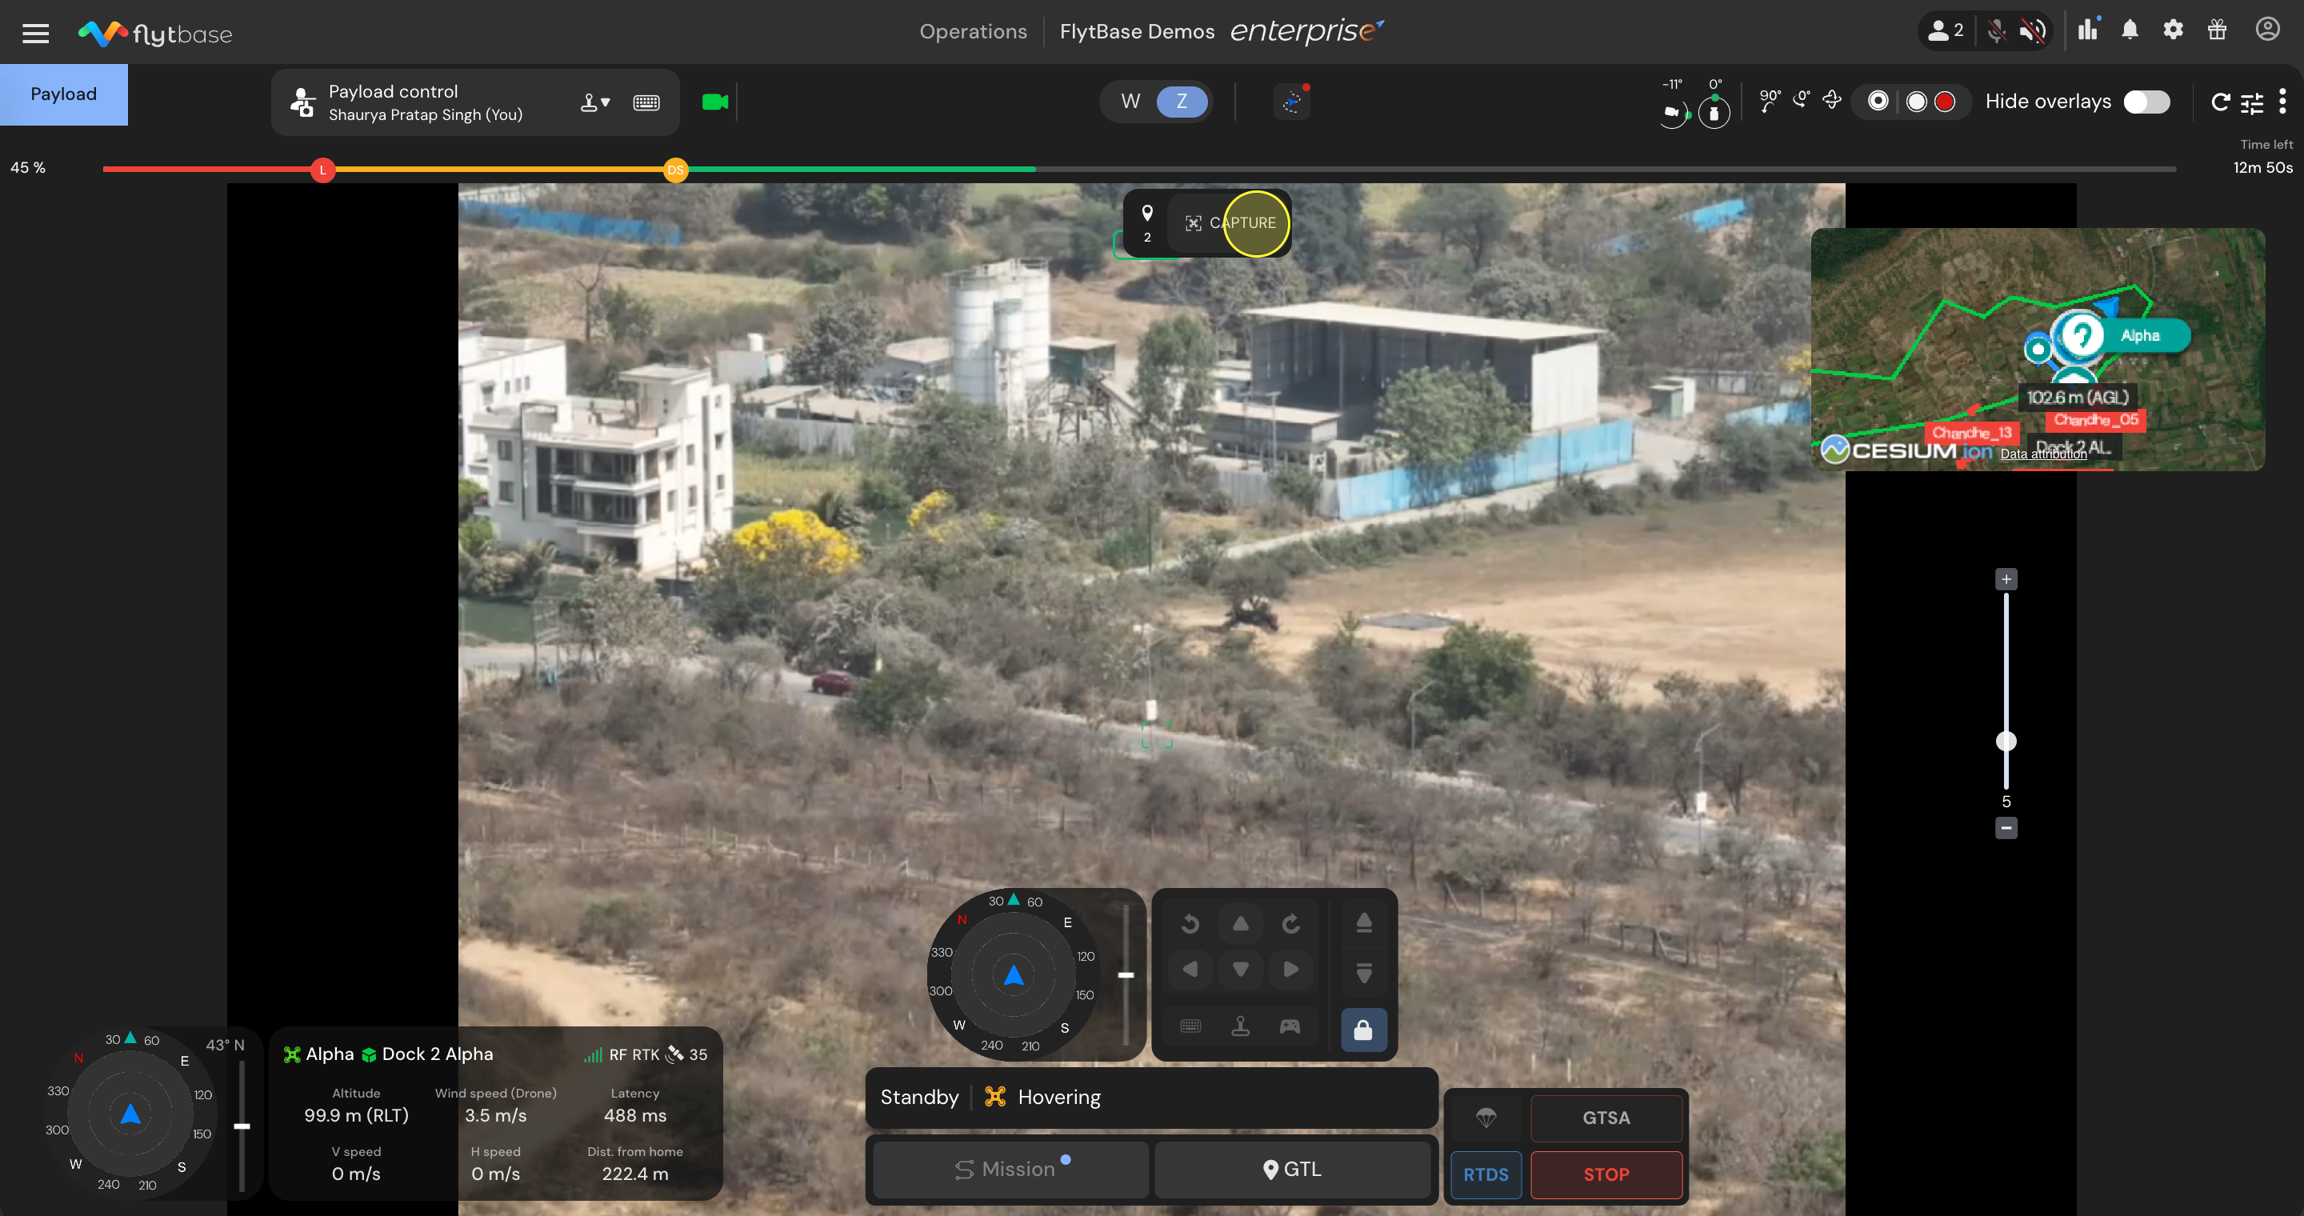
  • Click on the Capture button again to record another waypoint.

  • Once all the waypoints are recorded with their respective actions, to save this mission file, click again on the Start live mission recording button. After this you can may give the RTDS (Return to Docking Station) command.

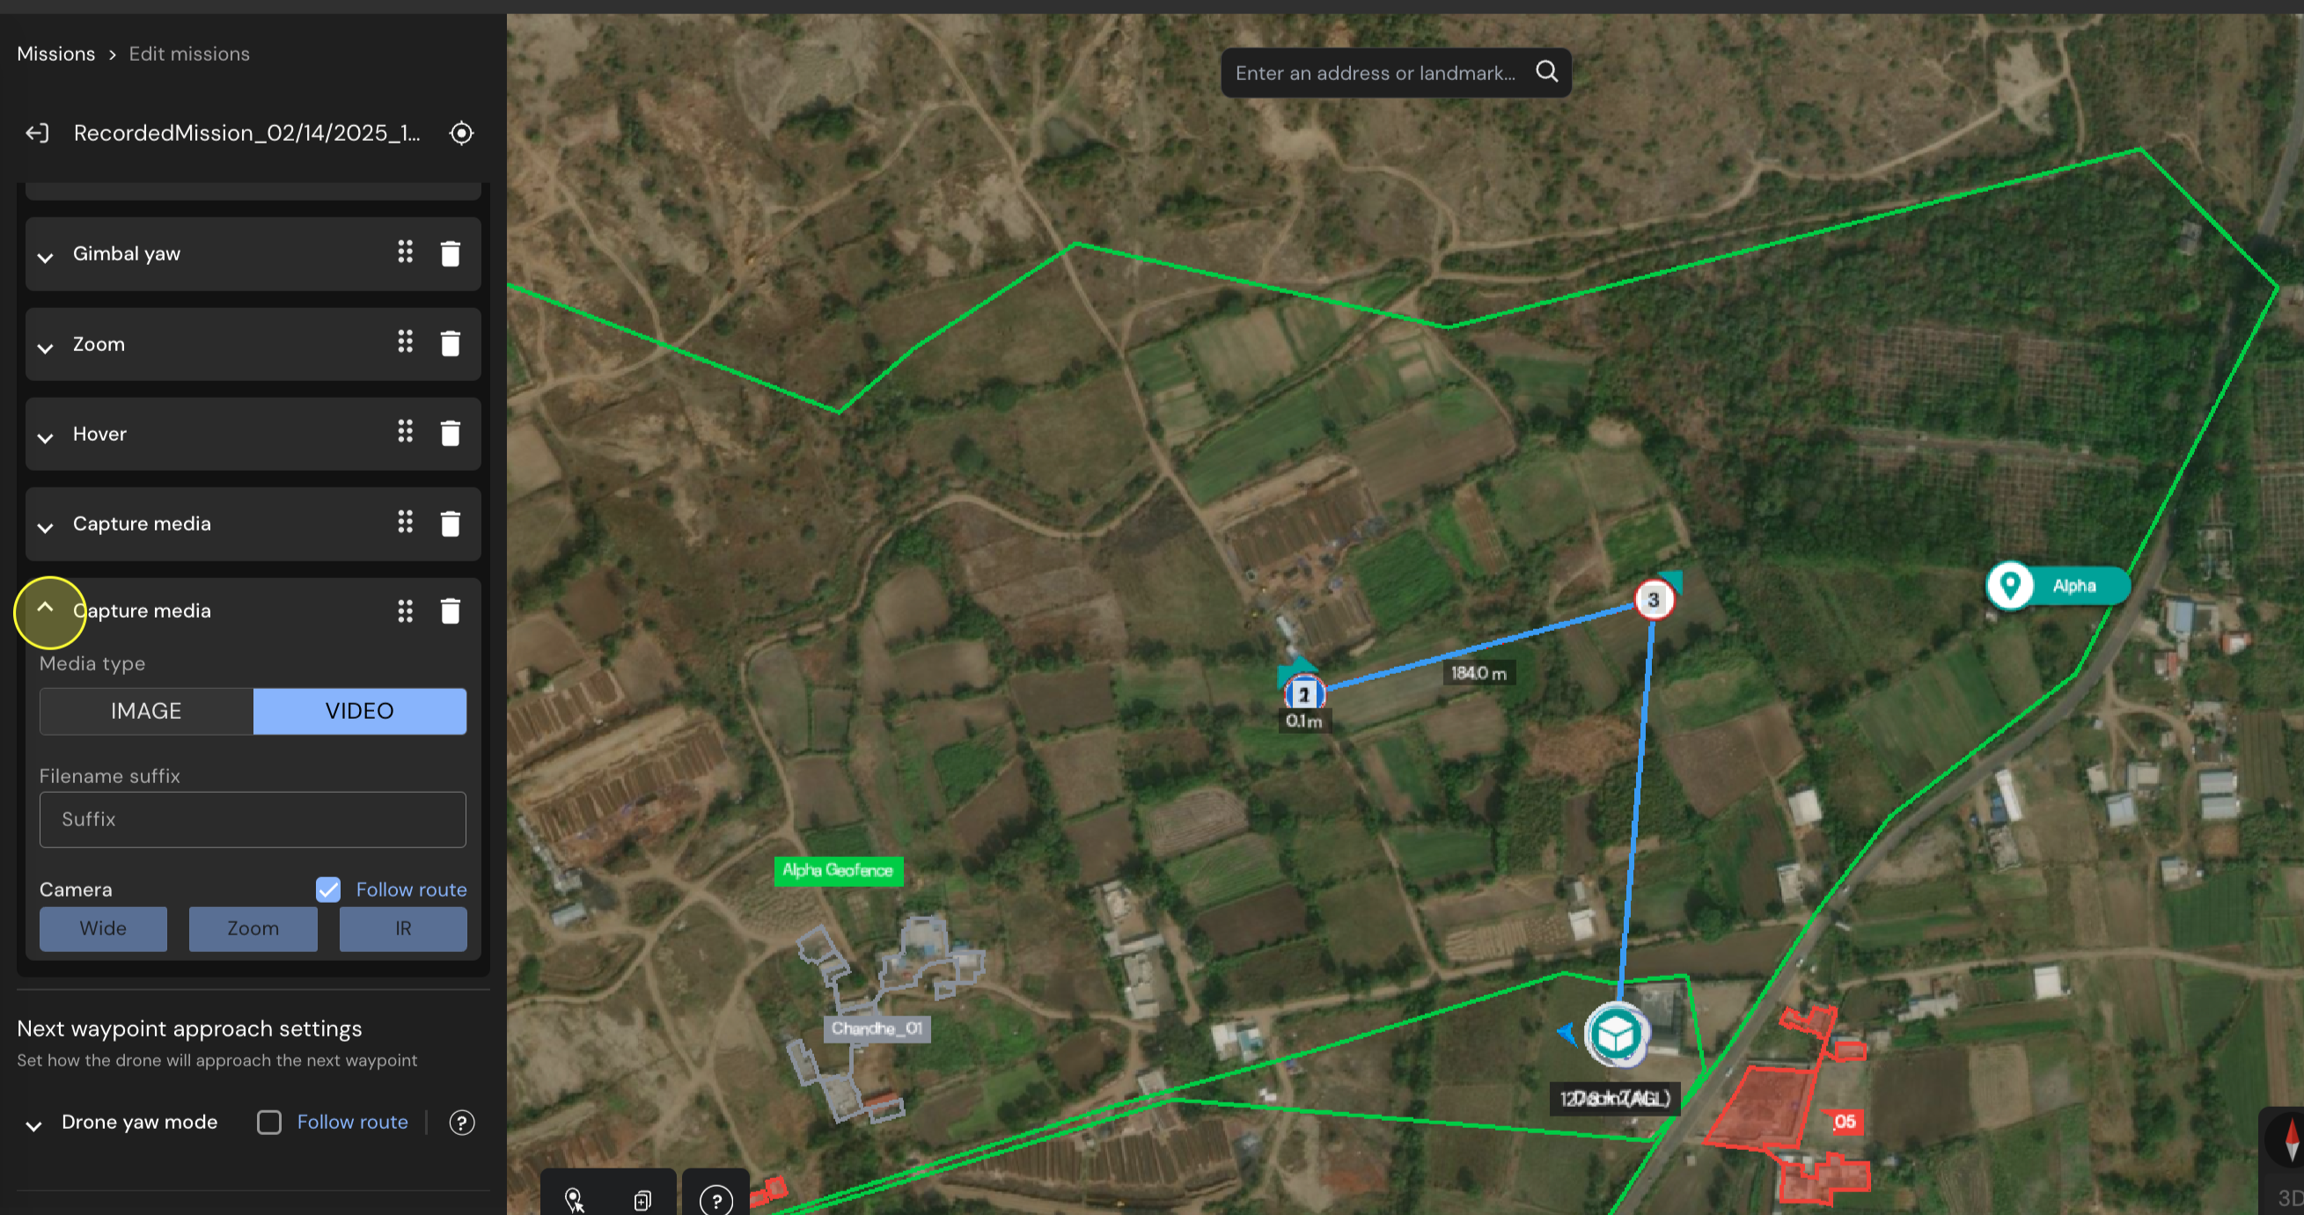
  • To view your recorded mission, navigate to the Missions tab. Here, you'll see your live recorded mission. Under it, adjust the parameters as needed and add more waypoint actions.

Please note that the video capture is not recorded during the mission recording feature.

If you need to capture a video, manually add another waypoint action and set that as video.

Capturing the first waypoint
Capturing a sequence of actions at the first waypoint in cockpit view
Go To Location (GTL) command to the next waypoint
Recording image capture action during live mission recording
Capturing the second waypoint
Saving the live mission capture in cockpit view
Manually editing the mission for for video capture action
Accessing the recorded mission