
Map Overlays
Map Overlays allows users to import and display 3D models, 2D maps, enhancing mission planning and data accuracy. Operators can easily manage overlays, adjust visibility, and ensure precise missions.
Overview
Map Overlays let you bring your own 2D orthomosaics, terrain, point clouds, and 3D models on top of the FlytBase base map. Use them whenever the default map tiles are out of date, are missing detail for your site, or do not reflect a fast-changing environment such as a construction zone or a freshly surveyed area.
Once uploaded, an overlay is assigned to one or more Sites and can be toggled on or off from the Map Overlays page and the Map Layers panel. Terrain overlays can additionally be promoted to the primary terrain source for terrain-aware mission planning.
Supported Overlay Formats for Enhanced Map Visualization:
FlytBase supports four overlay categories. The Type you pick in the import dialog determines which file formats the dialog will accept.
| Overlay type | What it is | Accepted formats | Size limit |
|---|---|---|---|
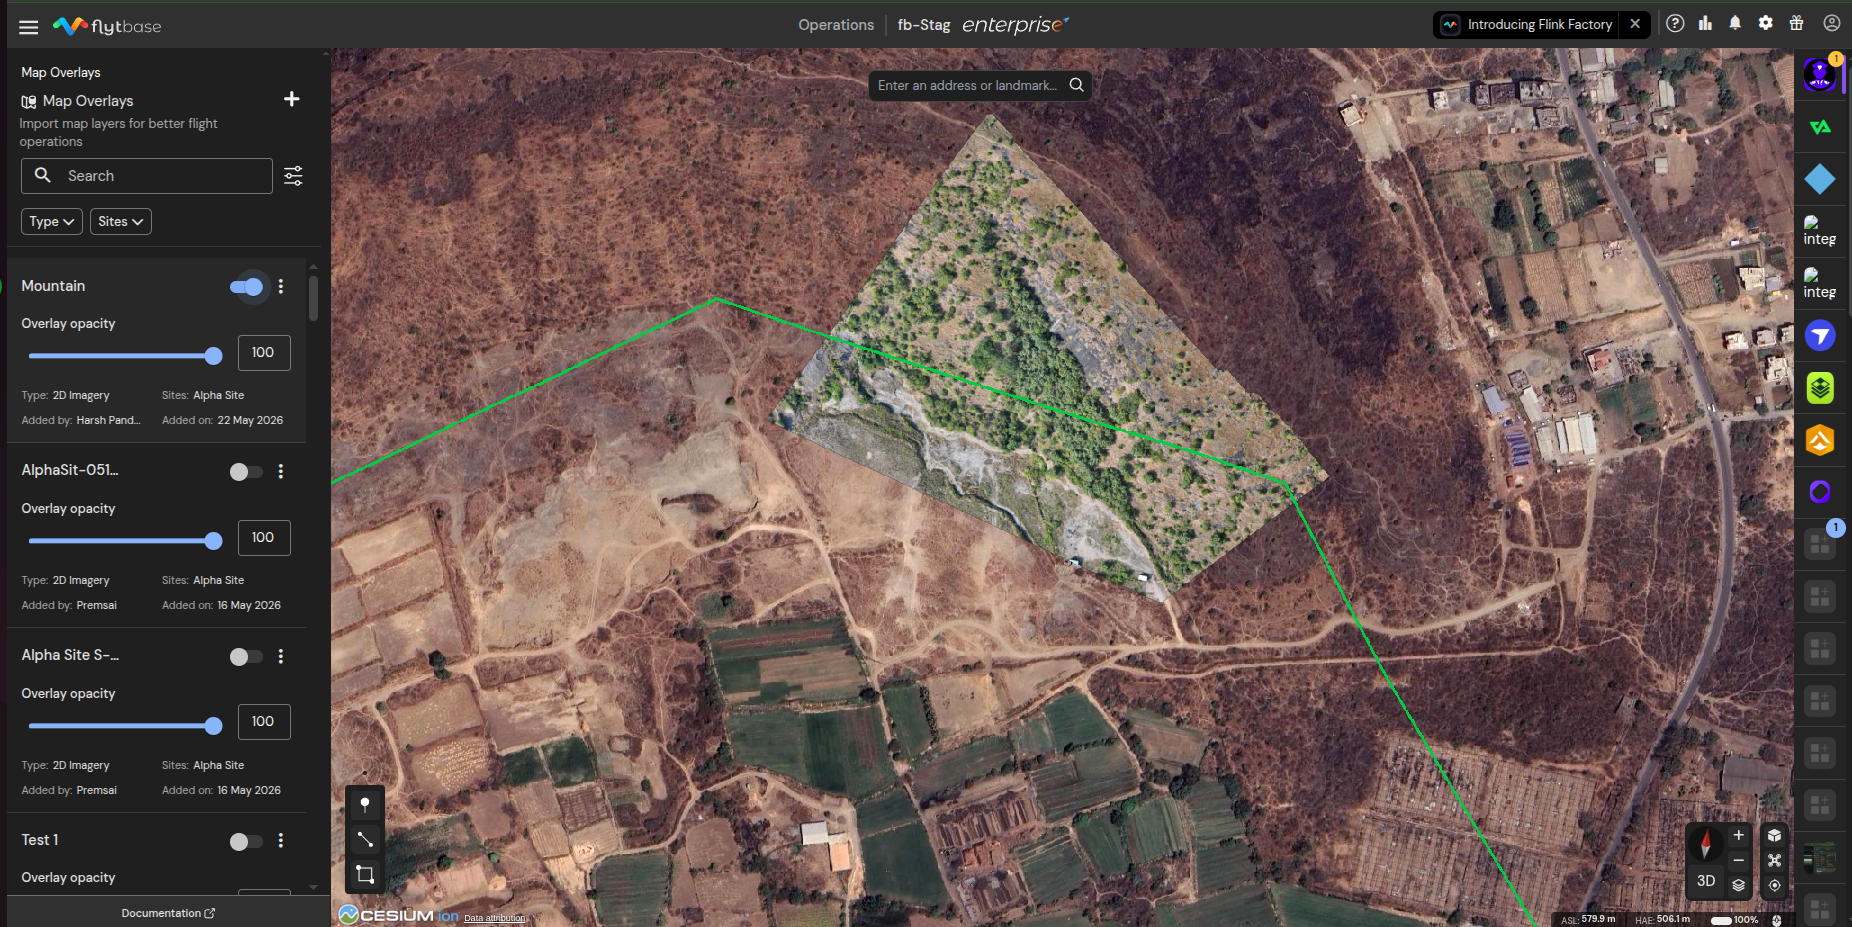
| 2D Imagery | A flat georeferenced image draped on the 2D base map. Use this for orthophotos, scanned site plans, or any reference image you want to see at ground level. | .tif, .tiff, .png, .jpg, .jpeg | No fixed cap — large files are uploaded in chunks. |
| Terrain | A Digital Elevation Model that overrides the default terrain source for terrain-aware planning. | .tif, .tiff, .img, .dem | 500 MB per file. |
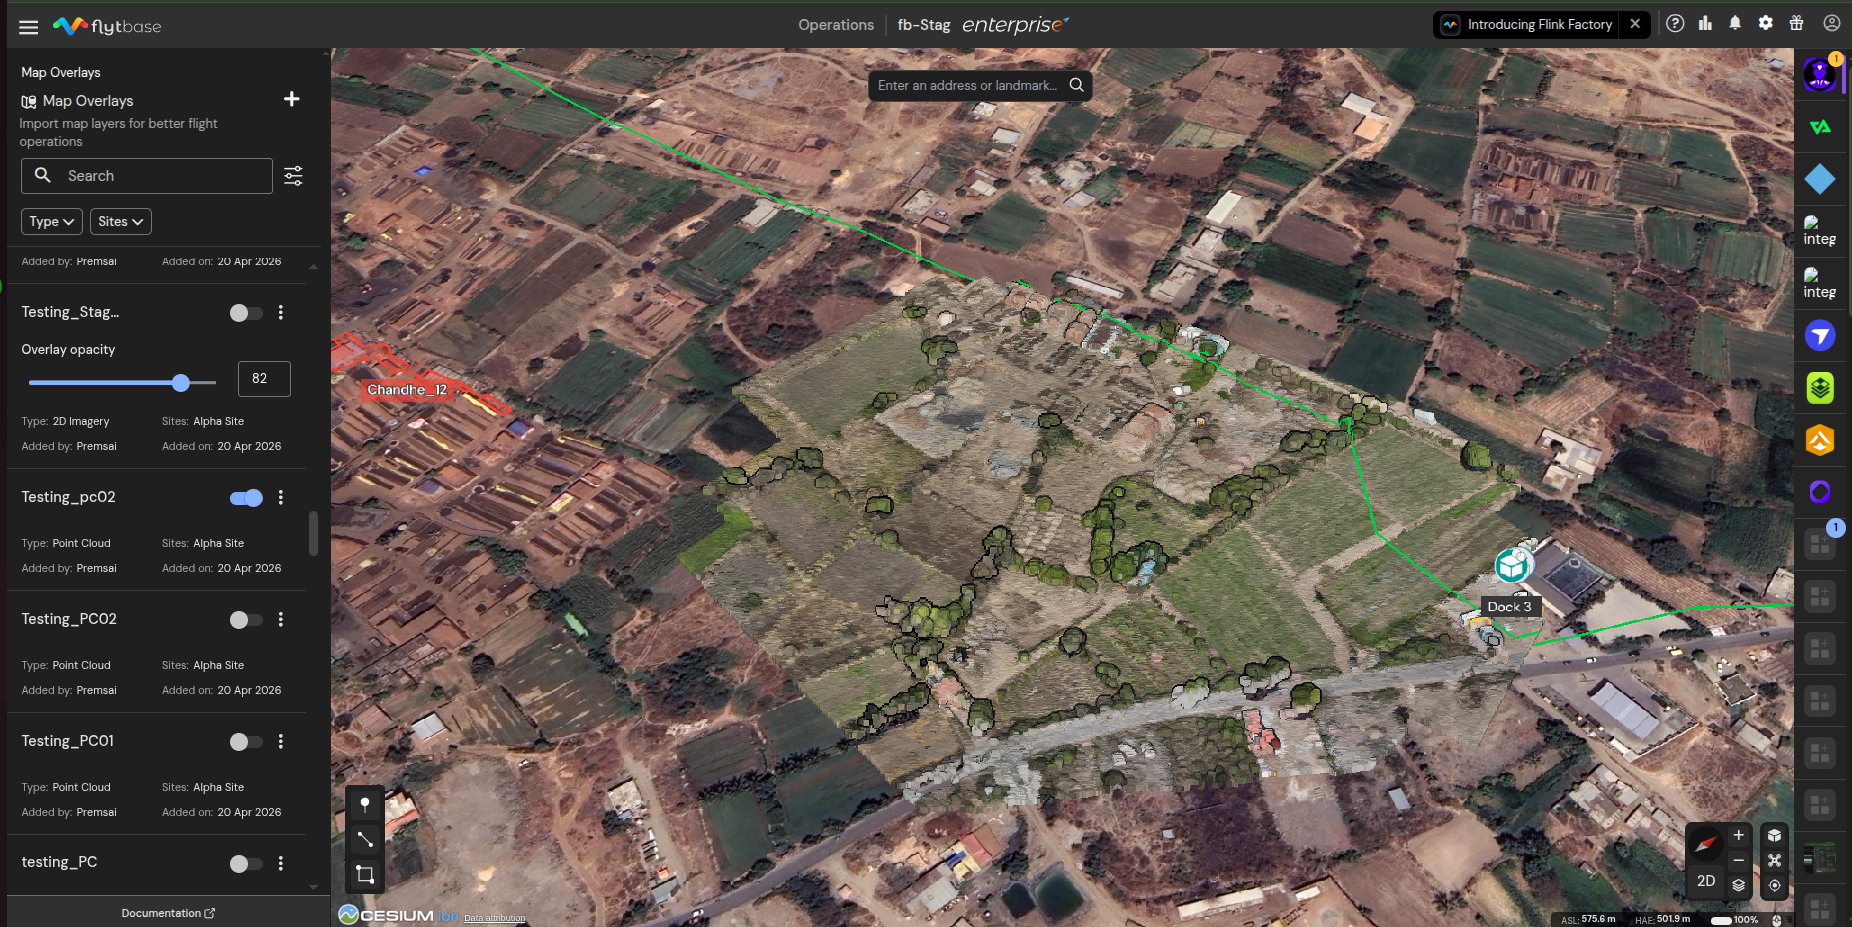
| Point Cloud | A LIDAR or photogrammetry point set rendered as a 3D layer on top of the map. | .las, .laz | No fixed cap — uploaded in chunks. |
| 3D Model | A 3D tile set — typically a photogrammetry mesh or scan output — rendered as a 3D layer on top of the map. | A .zip containing a tileset.json at the root, along with its b3dm payload files. | No fixed cap — uploaded in chunks. |
For 2D Imagery uploads in .png or .jpg format, make sure the file is zipped together with its companion geolocation file. PNG and JPG are not georeferenced on their own, so the geolocation tells FlytBase where on the map to place the image.
2D Map Overlays
- TIFF/GeoTIFF (.tif/.tiff) – Georeferenced orthophotos or scanned maps for flat overlays in mission planning or visual reference layers.
- PNG (.png) & JPG (.jpg/.jpeg) – Common raster formats for scanned maps or visual references without geospatial data.
Terrain Map Overlays
- TIFF/GeoTIFF (.tif/.tiff) – Ideal for georeferenced imagery used in detailed visualizations.
- IMG (.img) – Common in remote sensing applications, offering compatibility with large-scale data.
- DEM (.dem) – Digital Elevation Models for accurate terrain profiling and elevation rendering in point cloud visualizations.
Point Cloud Map Overlays
- LAS (.las) – Standard for aerial LIDAR data, providing detailed 3D point cloud terrain representation.
- LAZ (.laz) – Compressed LAS format with no data loss, ideal for efficient storage and transmission of survey-grade datasets.
3D Model
A 3D Model archive must be a .zip whose root directory contains the tileset.json and any folders it references (typically named after blocks or tiles, each holding the corresponding b3dm files). The import dialog shows an inline example of the expected layout — click the small information icon next to Supported Formats in the import dialog to see it.
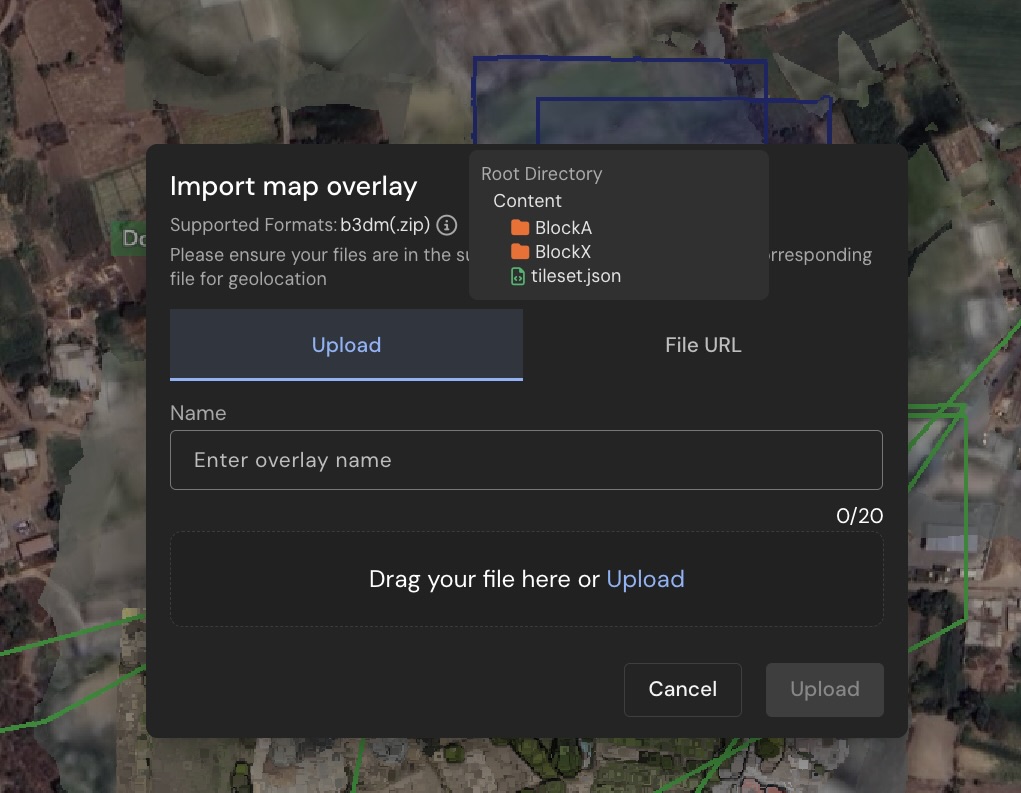
If your scan or photogrammetry tool exports the tile set nested inside a vendor-specific folder (for example terra_b3dms/tileset.json, or model/download/terra_b3dms/tileset.json), you can upload the archive as-is. FlytBase detects the nested layout and silently re-bundles the archive so the tile set sits at the root before sending it to the conversion pipeline. You do not need to manually re-zip these exports.

The automatic re-bundling produces a standard (non-Zip64) archive, so the re-bundled output must stay below the per-entry and overall 4 GB limits of the classic ZIP format. If your source archive is larger than that, please re-bundle it manually with the tile set already at the root.
Accessing Map Overlays
To access Map Overlays from the FlytBase Dashboard:
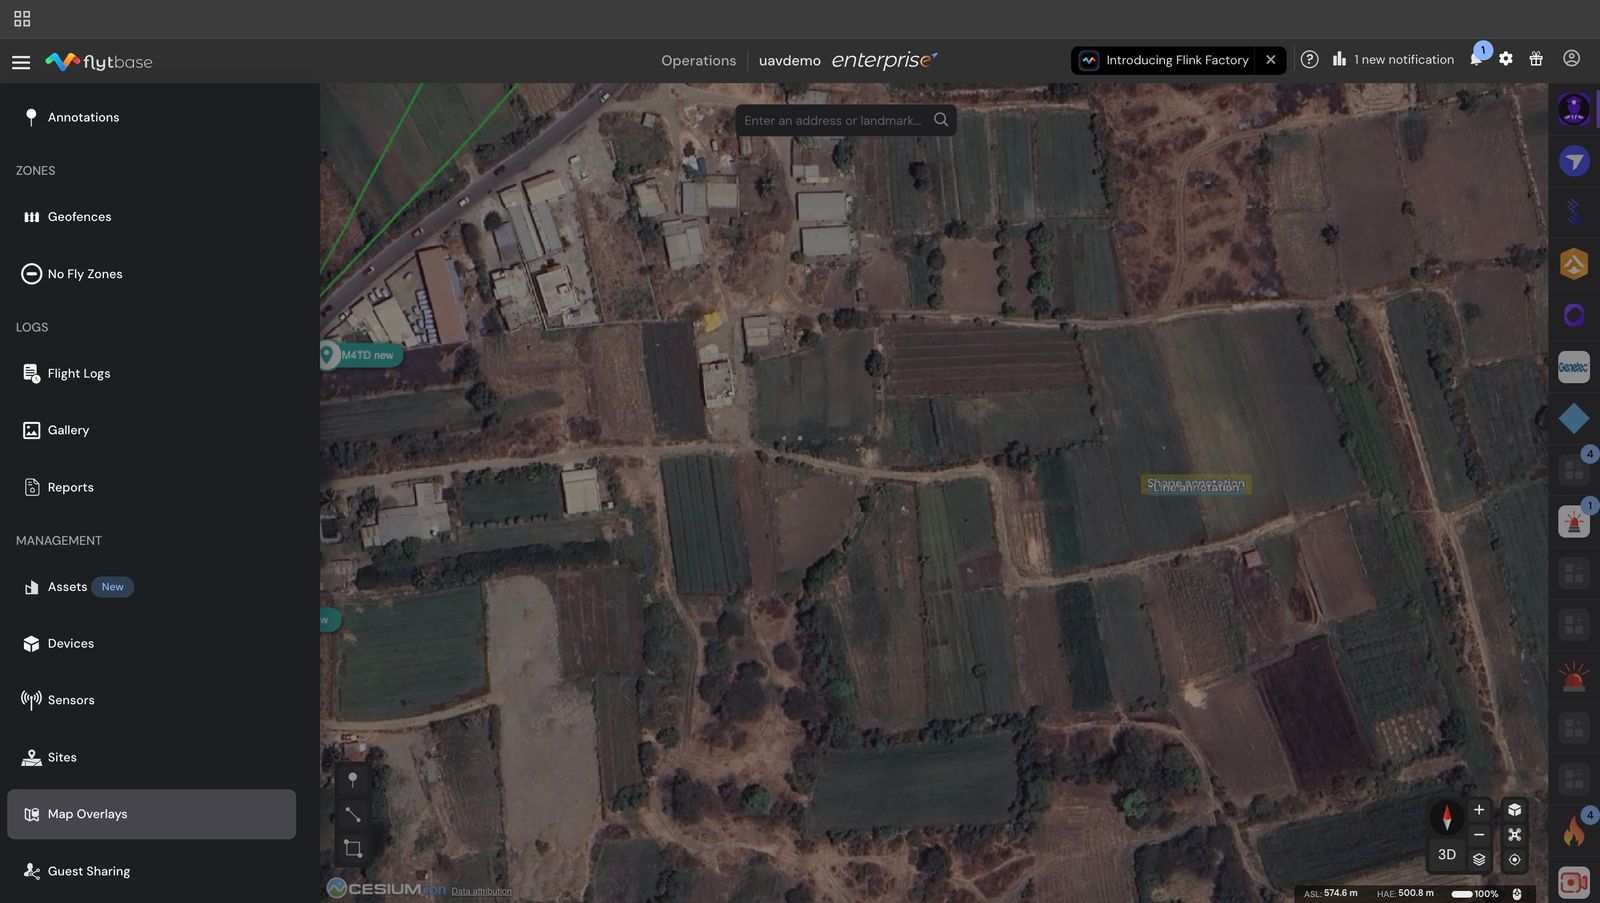
- Click on to open the Navigation Drawer
- Scroll down the list, and click on Map Overlays
Adding a Map Overlay
To add a new map overlay:
- Click on the to add a new overlay, this would open the import map overlay dialog box.

- Select the type of Map Overlay. You can choose between 2D Imagery, Terrain, Point clouds, and 3D models.
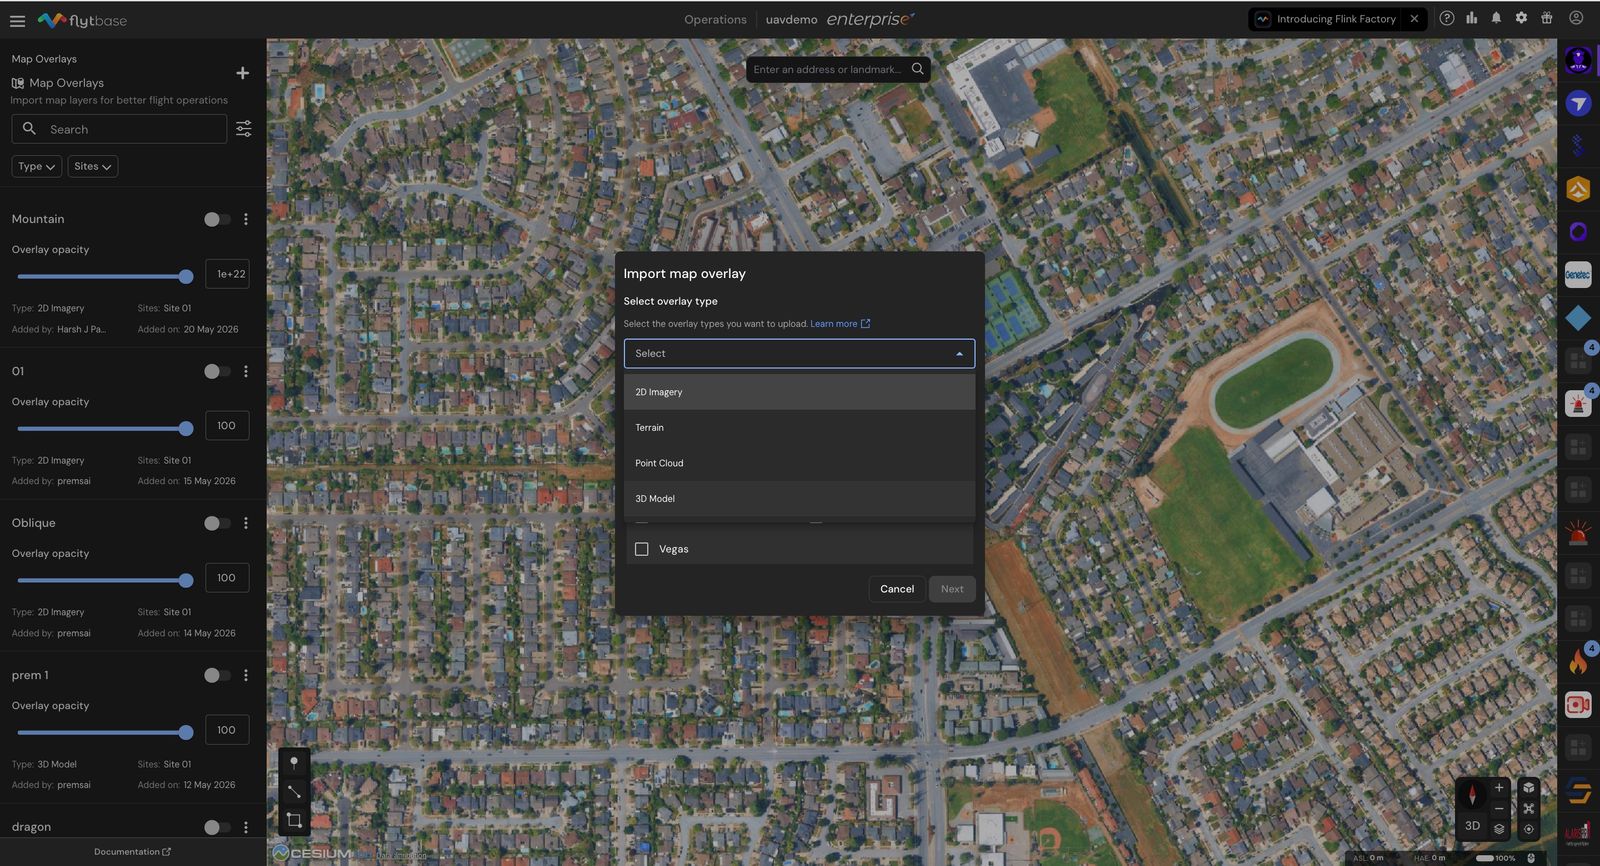
- Assign one or more Sites where the map overlay would be visible.
- Click on Next.
- To upload the overlay, you can either upload a file from your computer, or provide a downloadable link to the file.
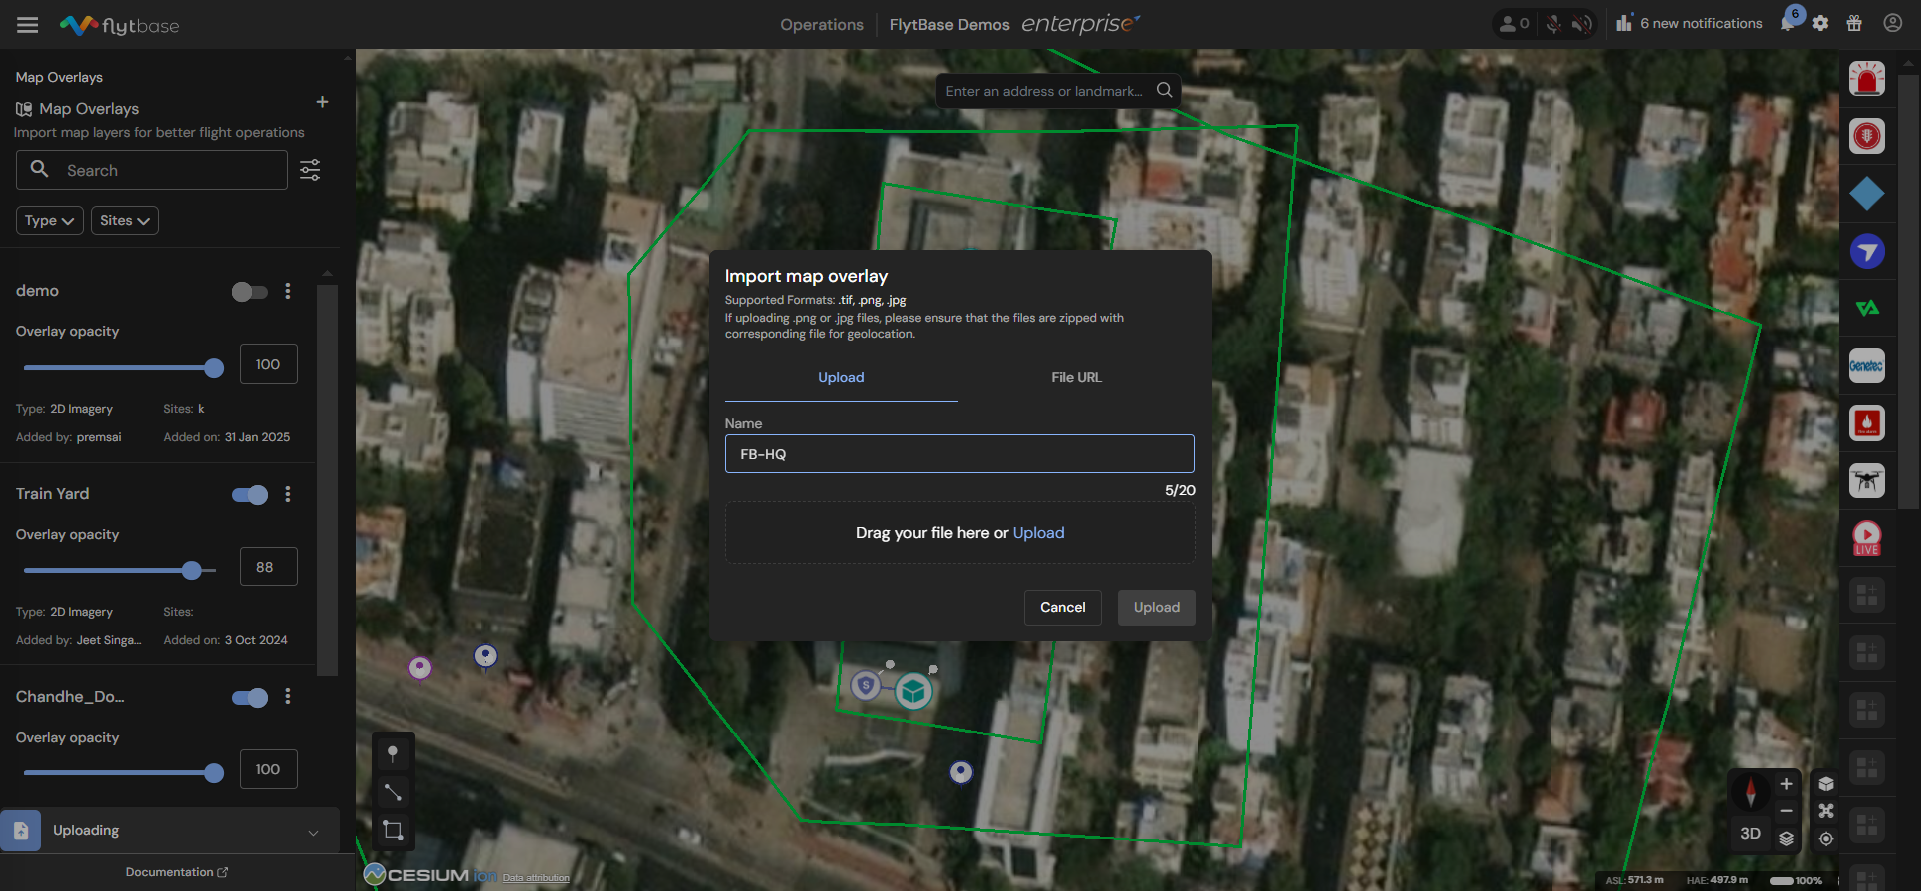
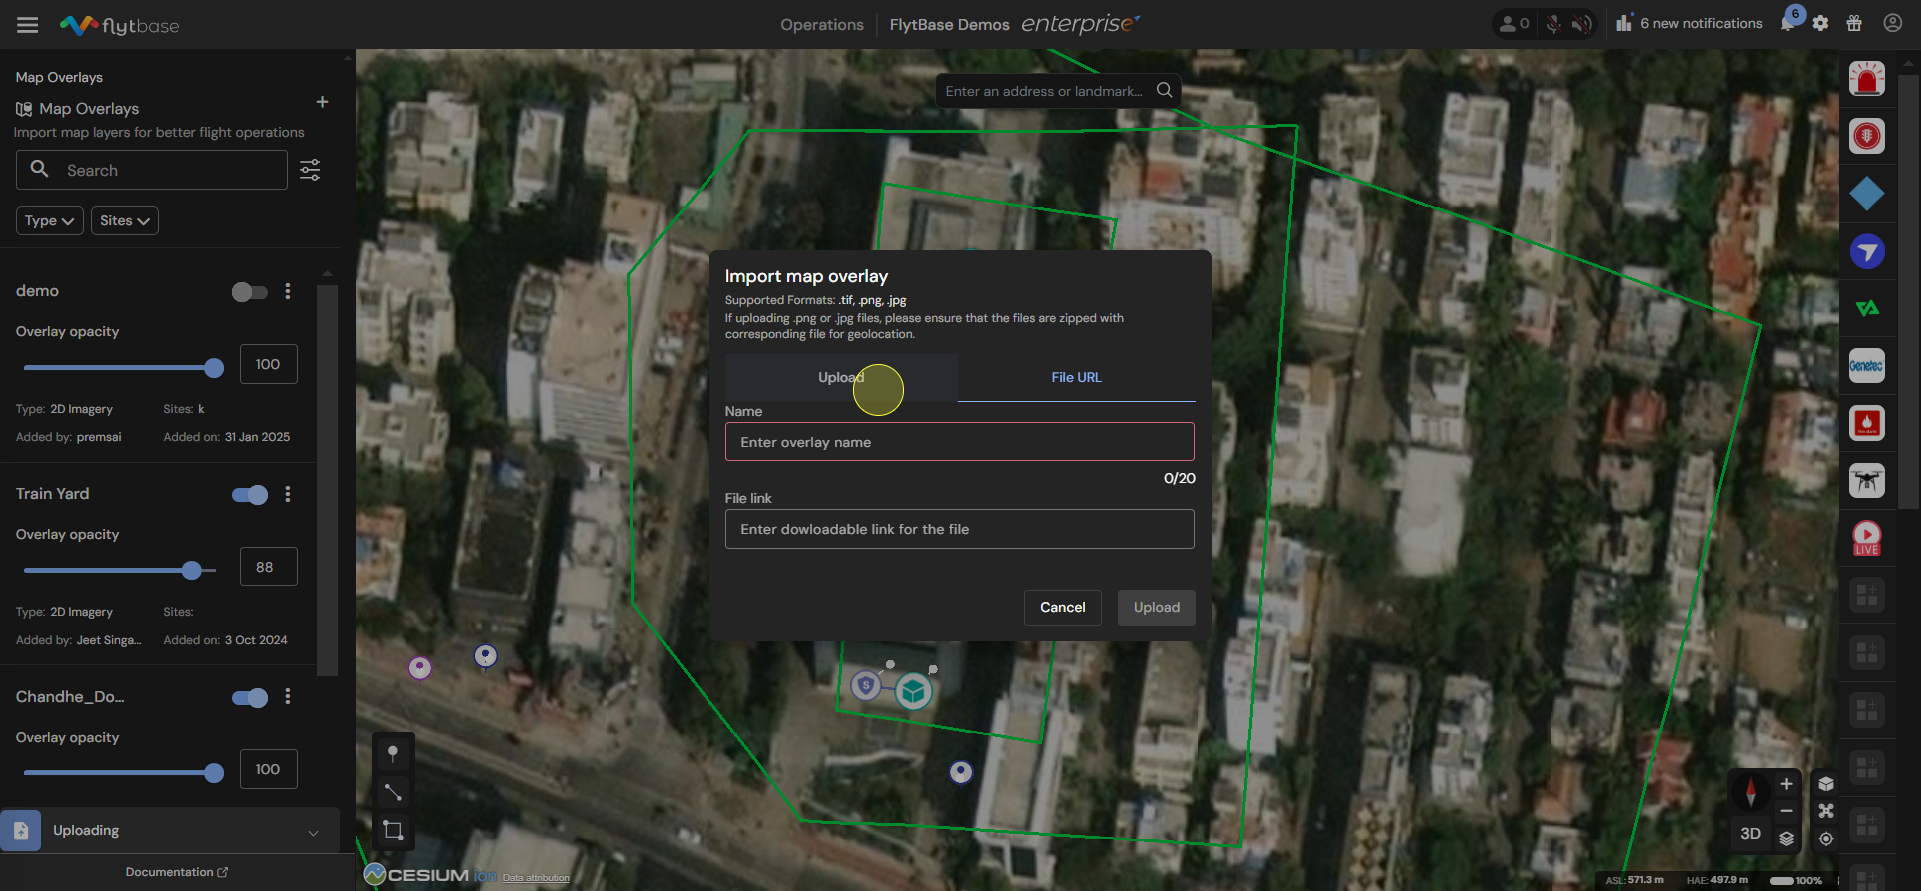
- After this, provide a name for the new overlay and click on Upload.
Managing your Map Overlays
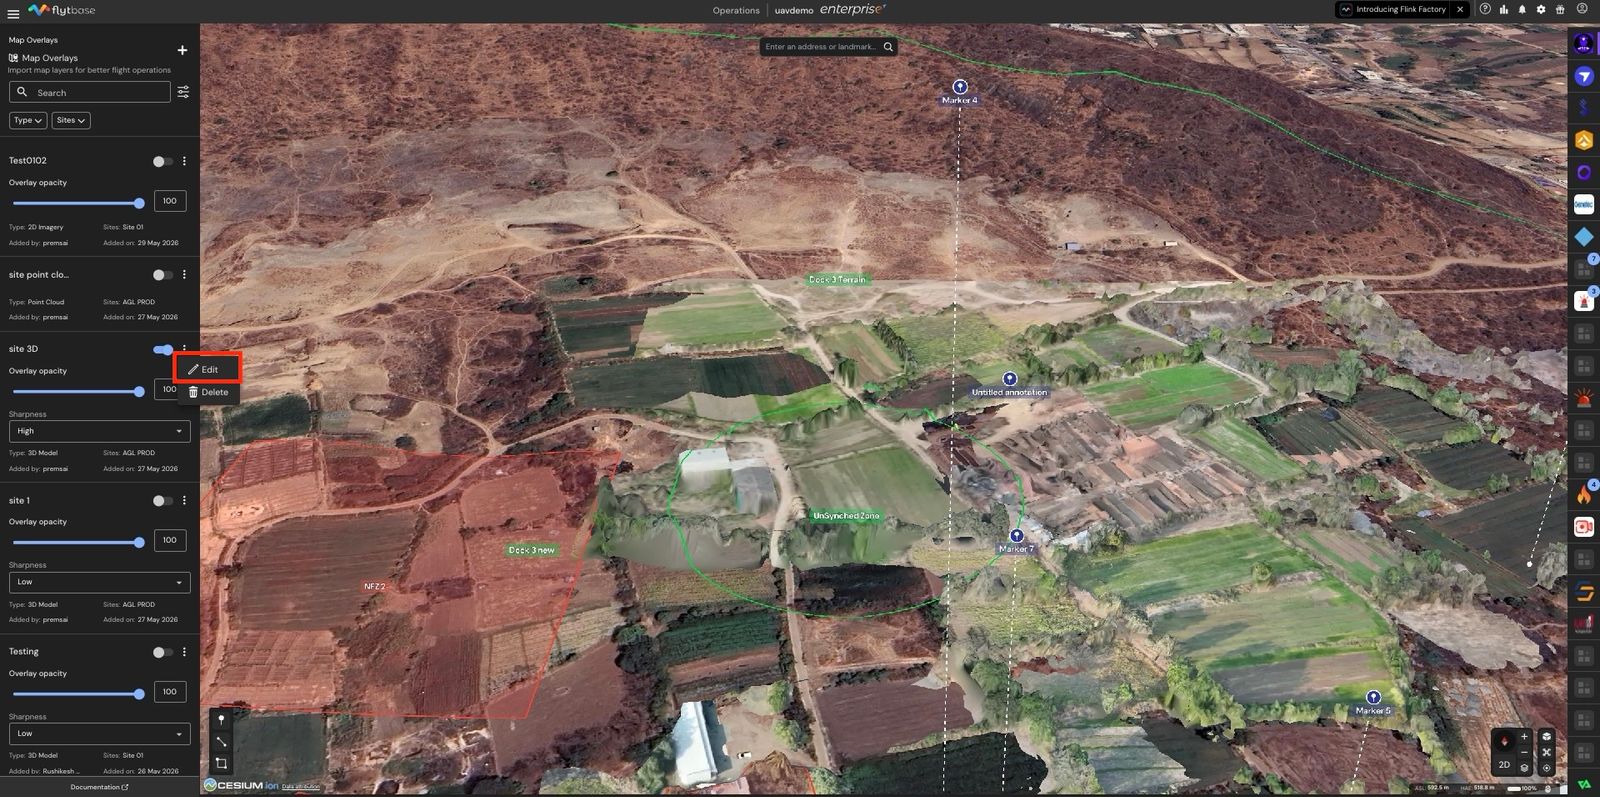
The Map Overlays manager allows you to add, delete, edit, and control the opacity of the files present.
- Search and sort. Use the search box to find an overlay by name. The sort control sorts the list by Name, Date added, or Date updated, in ascending or descending order.
- Filter. Use the Type and Sites filters to narrow the list down to a single overlay category or a single site.
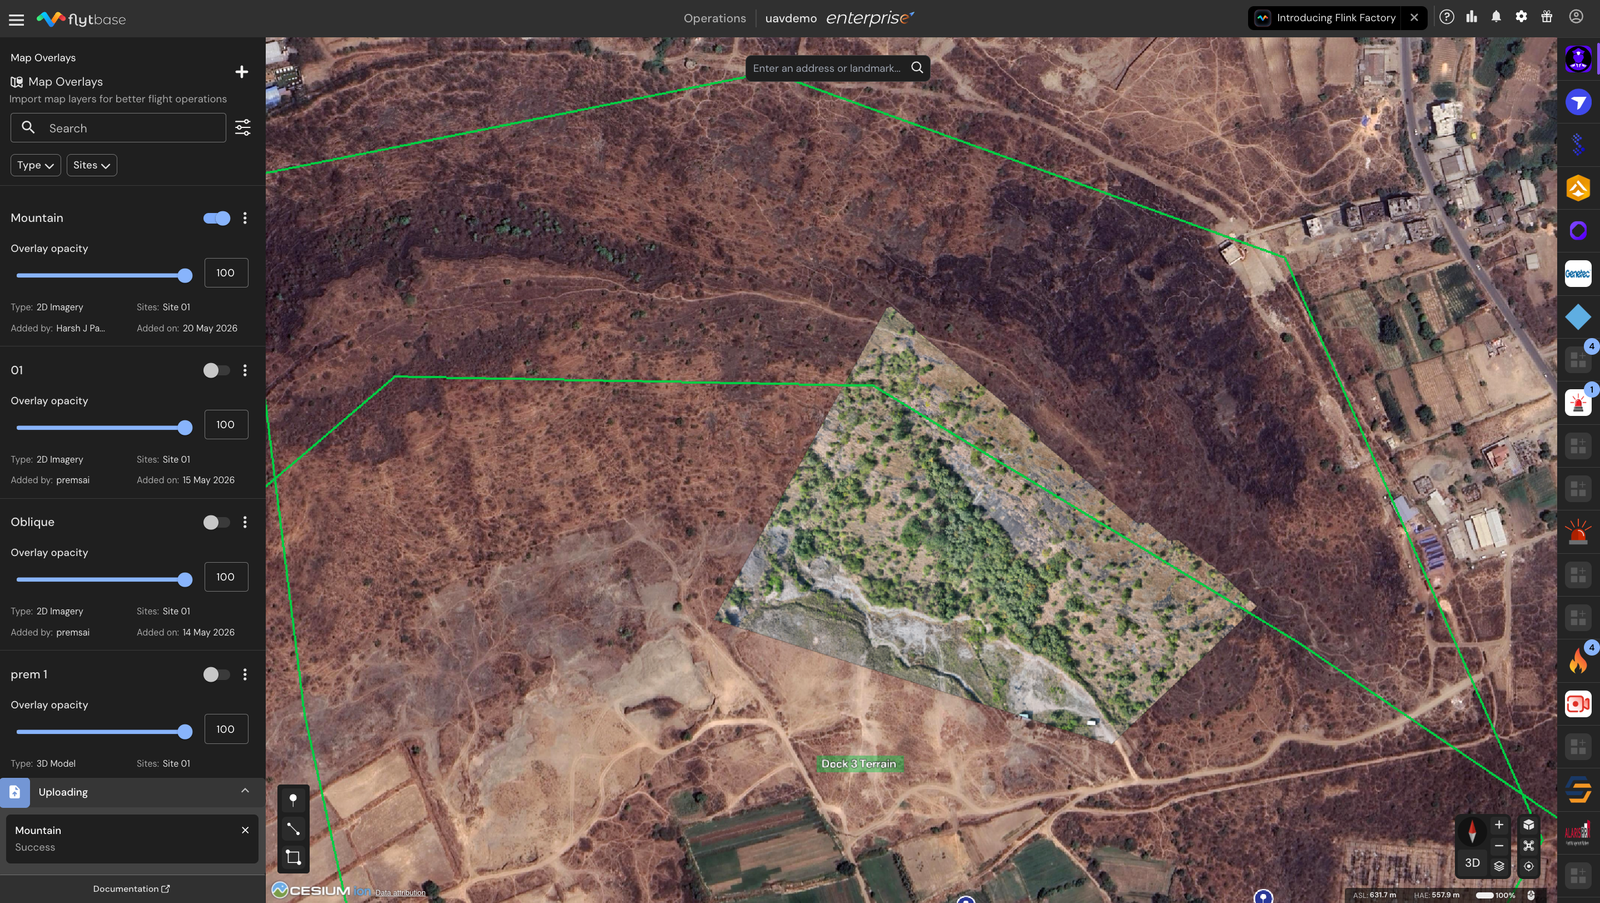
- Per-overlay visibility toggle. Each overlay card has a switch in its top-right corner. Toggle it on to render the overlay on the map, off to hide it. The toggle state is persisted, so the next time you open the dashboard the overlay returns in the same state.
- Per-overlay opacity slider. 2D Imagery and 3D Model overlays have an opacity slider on the card. Drag the slider (or type a value in the number box) between 0 and 100 to control how strongly the overlay blends with whatever is underneath.
- Center on overlay. Click anywhere on the overlay card (outside the toggle and menu) to pan and zoom the map to the overlay's location.

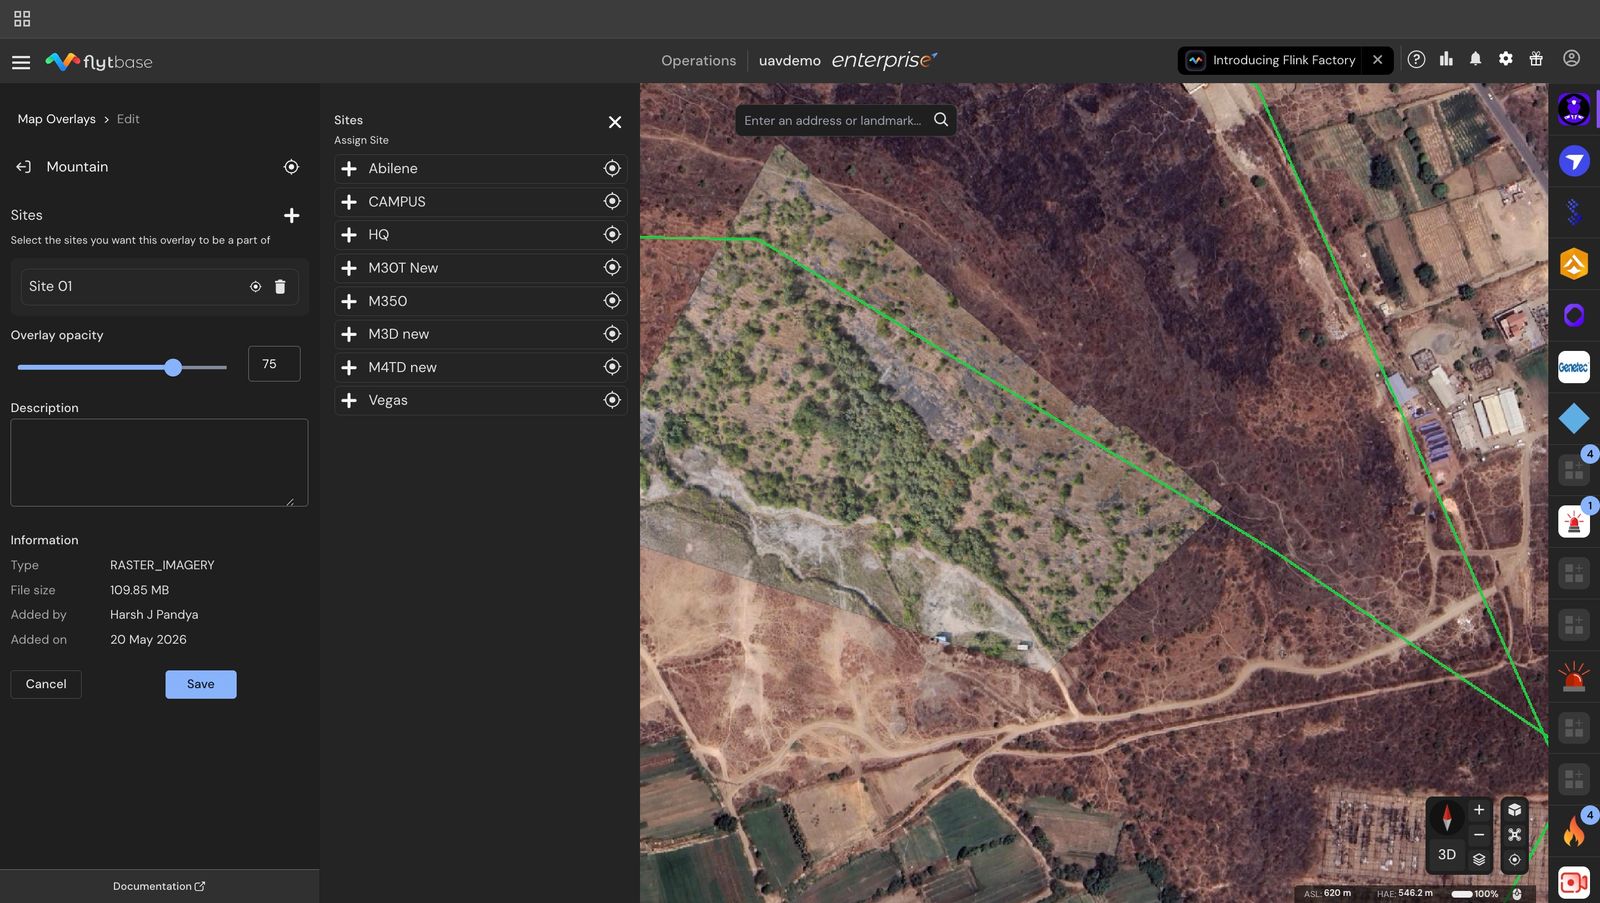
- Edit. Open the three-dot menu on the card and click Edit to change the overlay's name, description, opacity, and site assignments. The site selector is multi-select — assign or unassign as many sites as you need, then click Save.
- Delete. Open the three-dot menu and click Delete. The map is immediately cleared of the overlay and the underlying files are removed.
- Save. Once you’ve assigned the overlay to the required sites and chosen an appropriate opacity, simply click Save to update the overlay.
Was this helpful?