
Managing Your Organization
Learn how to manage your organization on FlytBase, including viewing organization info, managing members, configuring permissions, updating settings, and handling device subscriptions.
Owners, Administrators, and Users can manage an organization by clicking on the Manage option from the All Organizations page. Select the organization to open the Management Console.
Organization Info
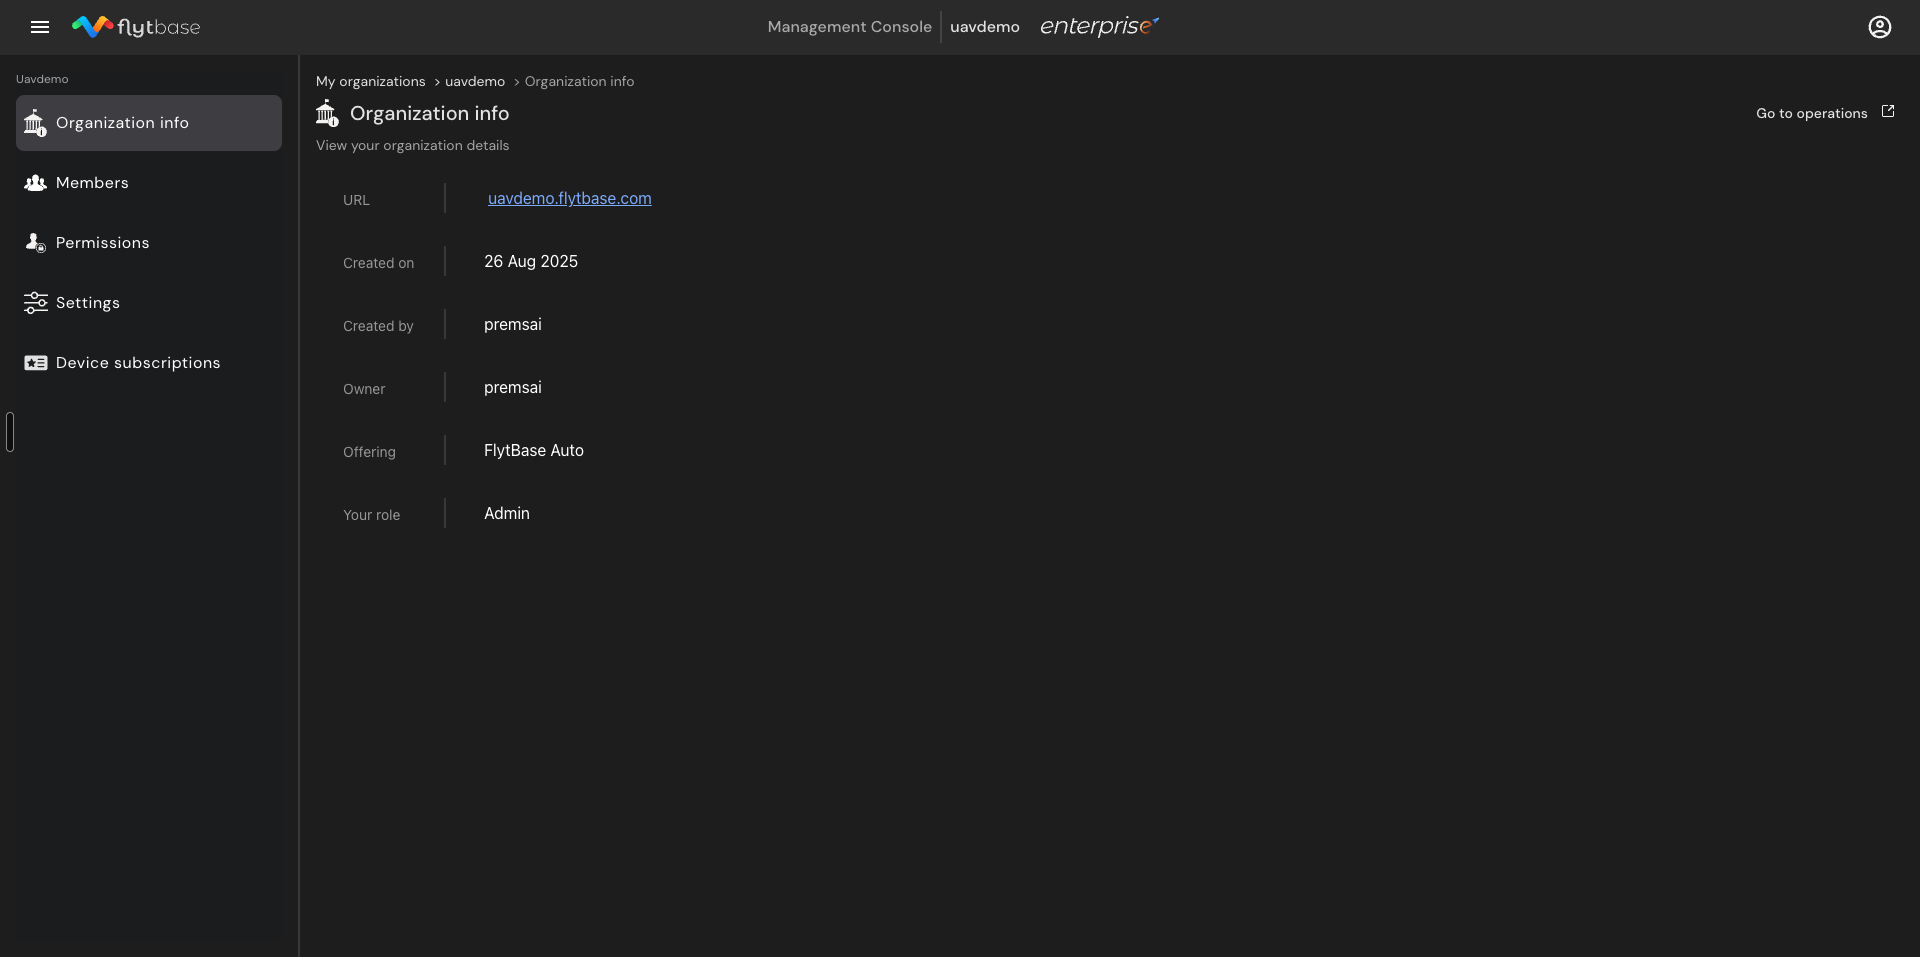
Navigate to Organization Info to view key details about the organization:
- URL - the organization's FlytBase URL
- Created on - the date the organization was created
- Created by - the user who created the organization
- Owner - the current owner of the organization
- Offering - the FlytBase plan associated with the organization
- Your role - the role assigned to the current user
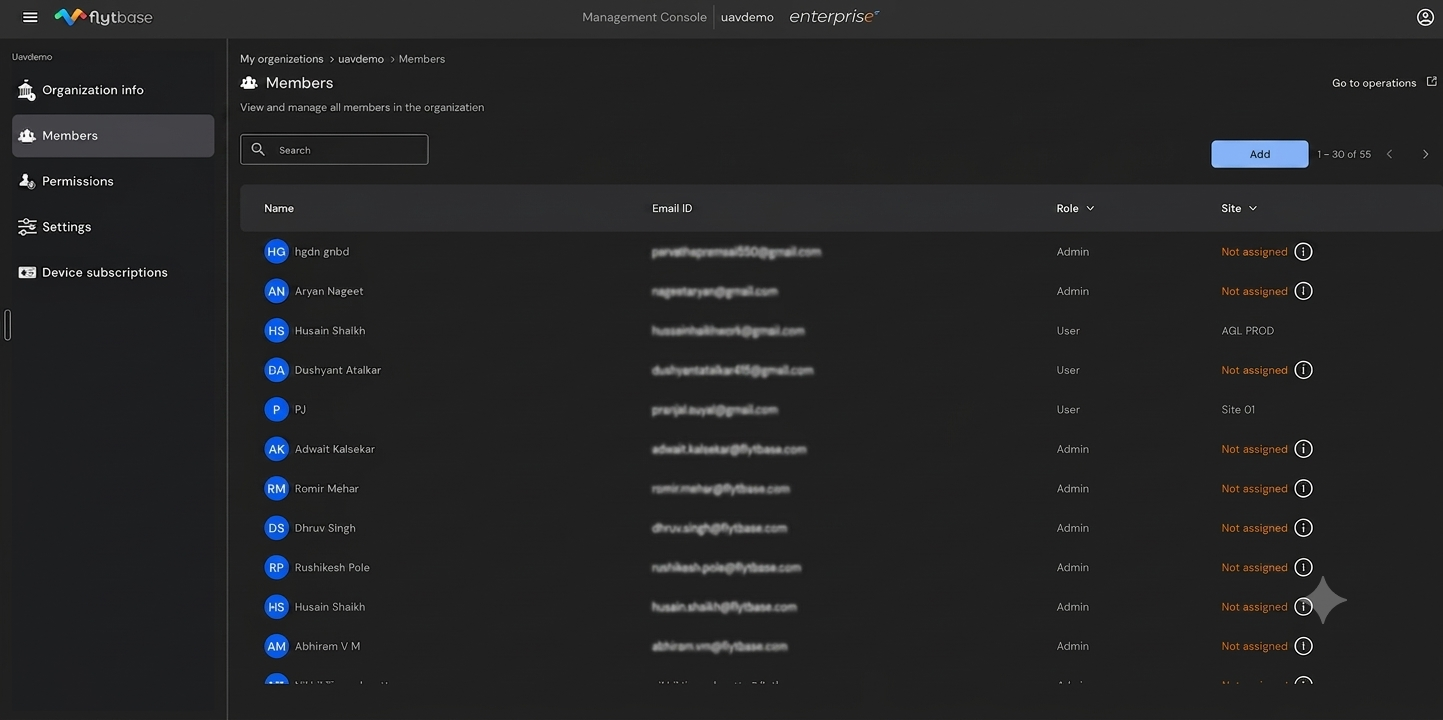
Members
The Members tab displays all members in the organization along with their name, email ID, role, and assigned site.
Adding Members to the Organization
Owners and Administrators can add new members to the organization.
- Click on the Add button in the upper right corner of the Members page.
- Enter the email ID of the user to invite.
- Select the role to assign to the user from the Role dropdown.
- Click on Send Invite to send the invitation.
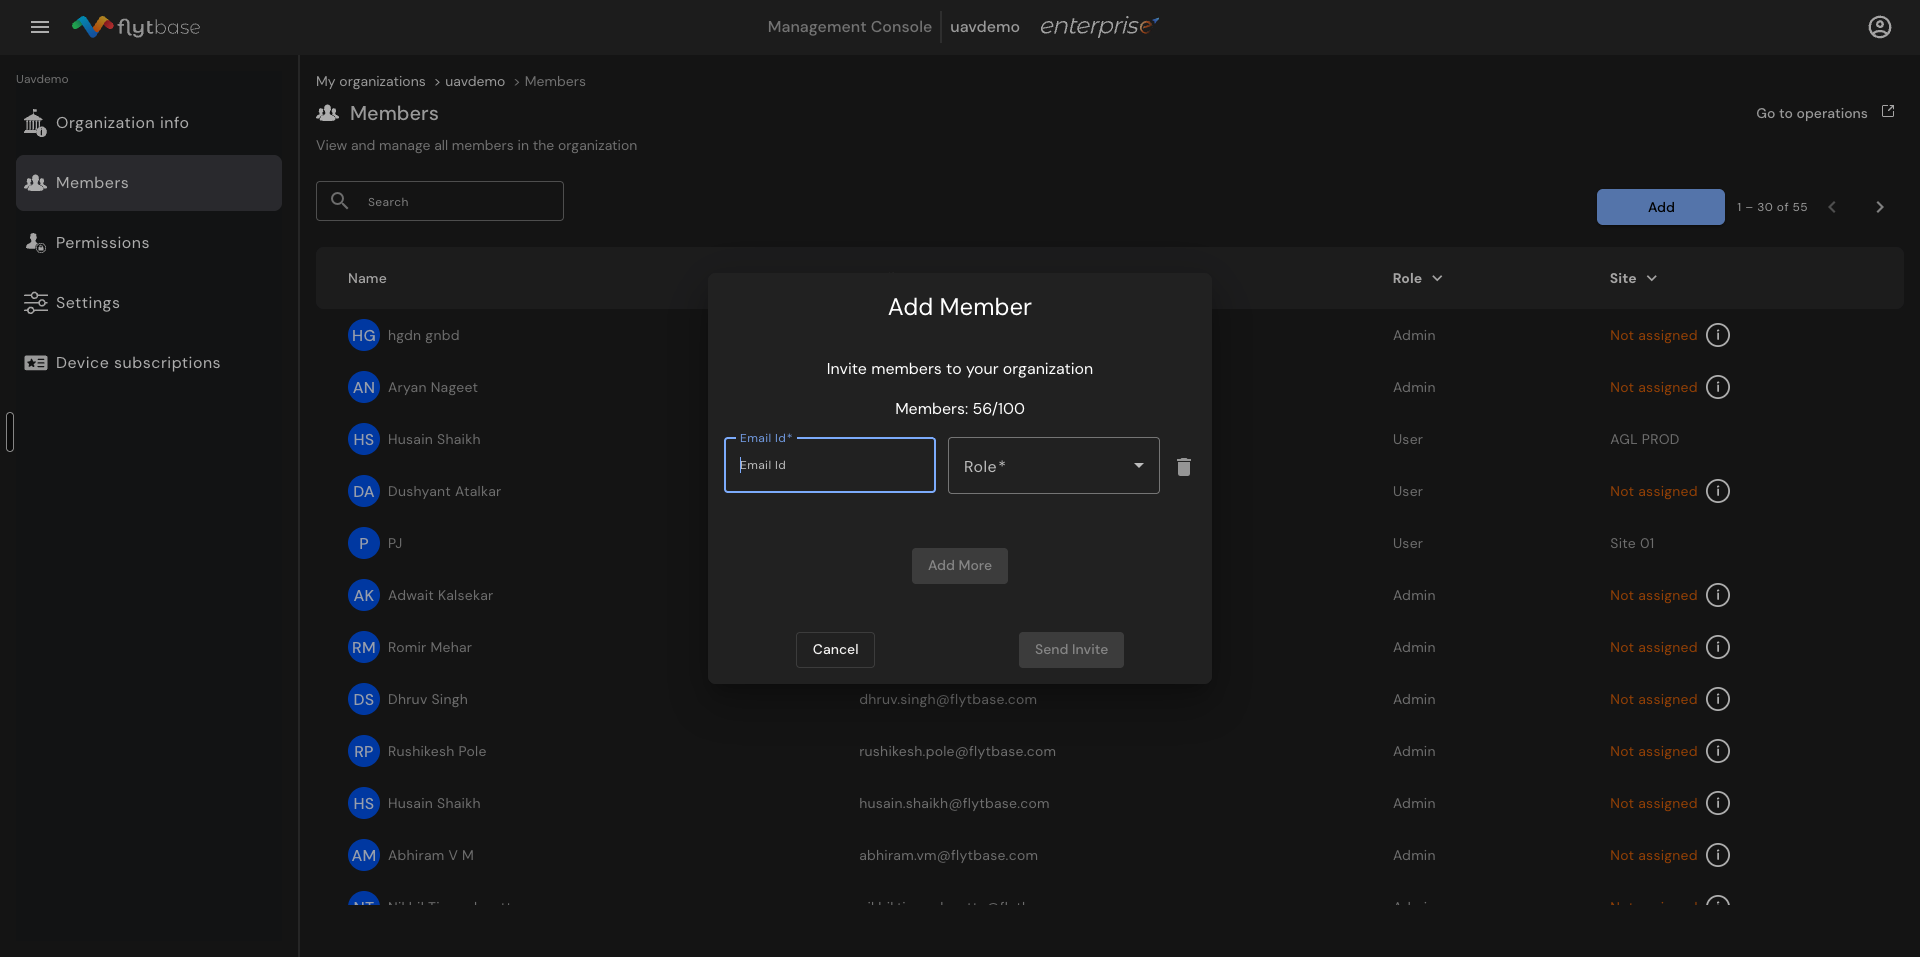
- To add multiple users at once, click on the Add More option before sending the invite.
- The invited user joins the organization by accepting the invitation sent to their email.
The maximum number of members that can be added to an organization is 100. Monitor your current count displayed in the Add Member dialog.
Changing the Role of a User
Owners and Administrators can change the roles of users in the organization.
- In the Members tab, click on the user whose role needs to be changed.
- Click on the role dropdown to select the new role.
- Close the sidebar to receive a confirmation prompt.
- Click on Confirm to apply the role change.
Administrators can change the role of other administrators and users. However, administrators cannot change the role of the Owner.
Removing Users from the Organization
Owners and Administrators can remove users from the organization.
- In the Members tab, click on the user to remove.
- Locate the Remove from Organization button on the right side of the panel.
- Click on Remove when the confirmation message appears.
Owners and administrators can remove administrators and users. However, administrators do not have the authority to remove the Owner.
Permissions
The Permissions page displays the Role-Based Access Control (RBAC) matrix for the organization. It shows the actions available to each role - Owner, Admin, and User - across the following categories:
- Members - Transfer Ownership, Delete Organizations, Create Organizations, Edit Organizations Info, View Organizations Info, Add/edit/remove Members
- Devices - Add/edit/delete Device Slots, Add/edit/delete Devices, Manage Billing
- Operations - Perform Live Operations, Add/edit/delete Site, and more
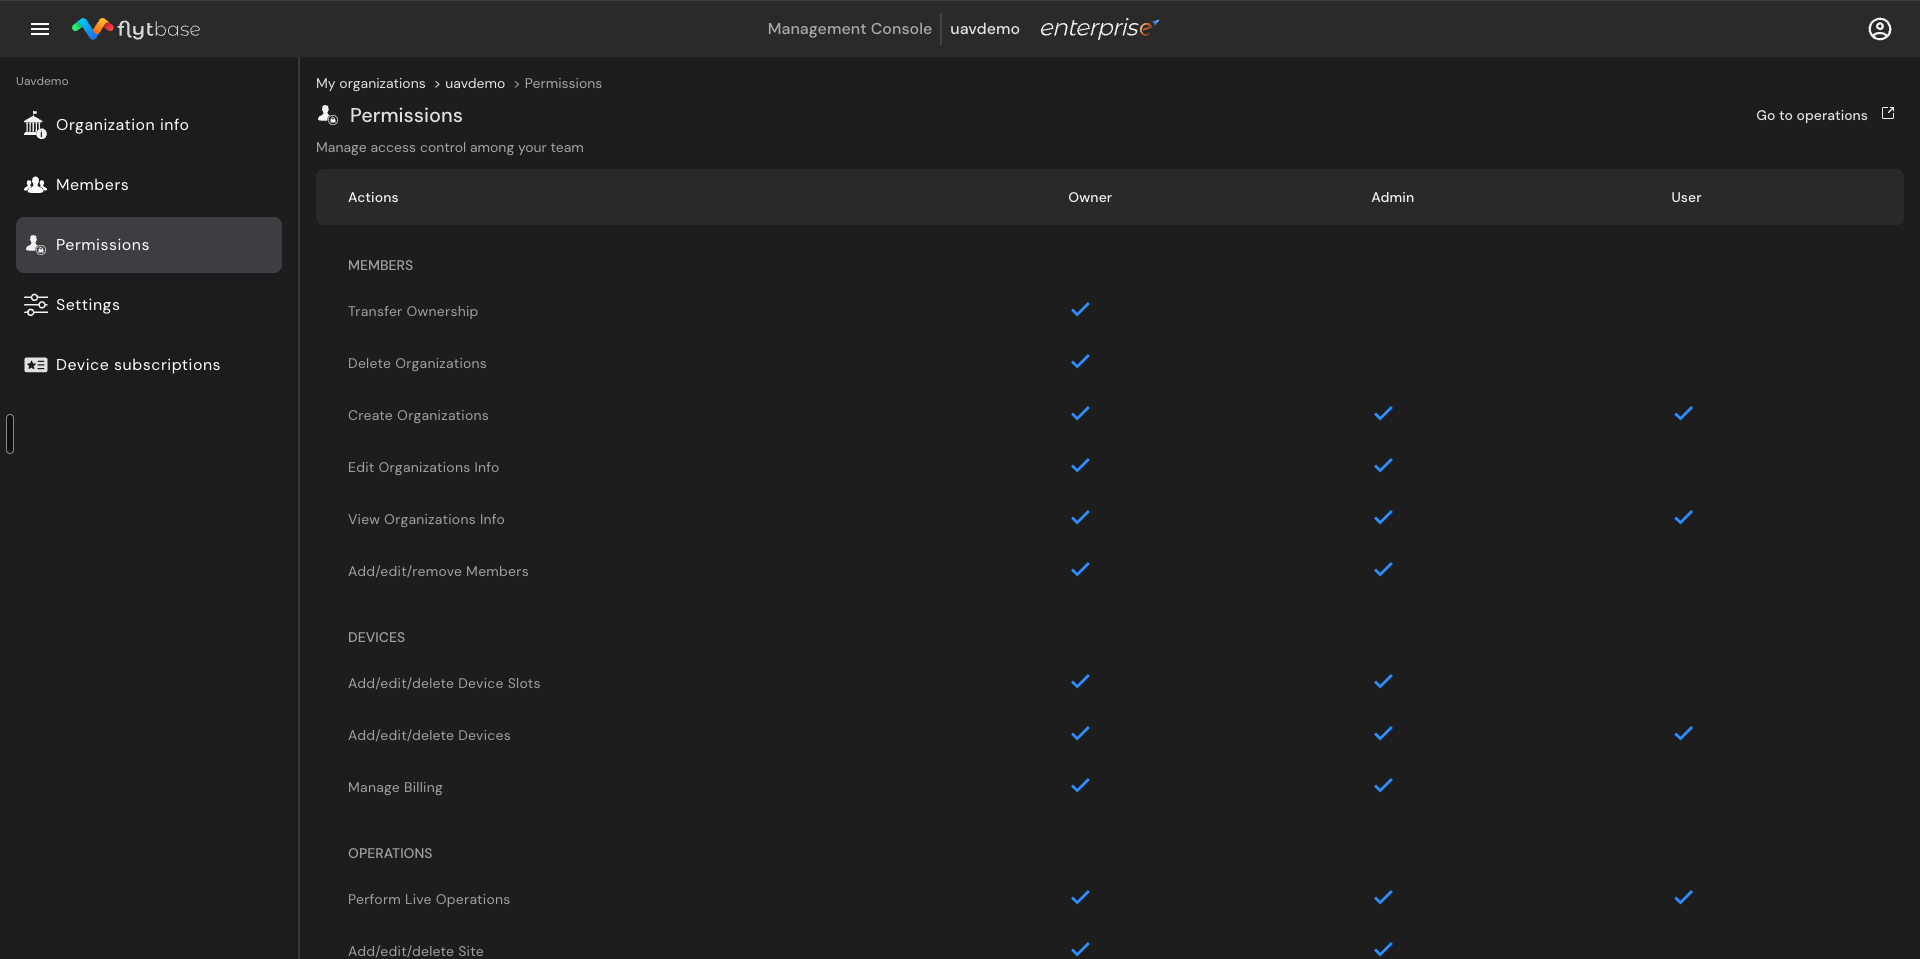
Use this page to understand which actions are allowed, restricted, or configurable for each role.
Settings
Navigate to Settings to manage the organization name and subdomain.
- Organization name - click on Edit to change the organization name at any time.
- Organization sub-domain - click on Change to update the subdomain used in the organization URL.
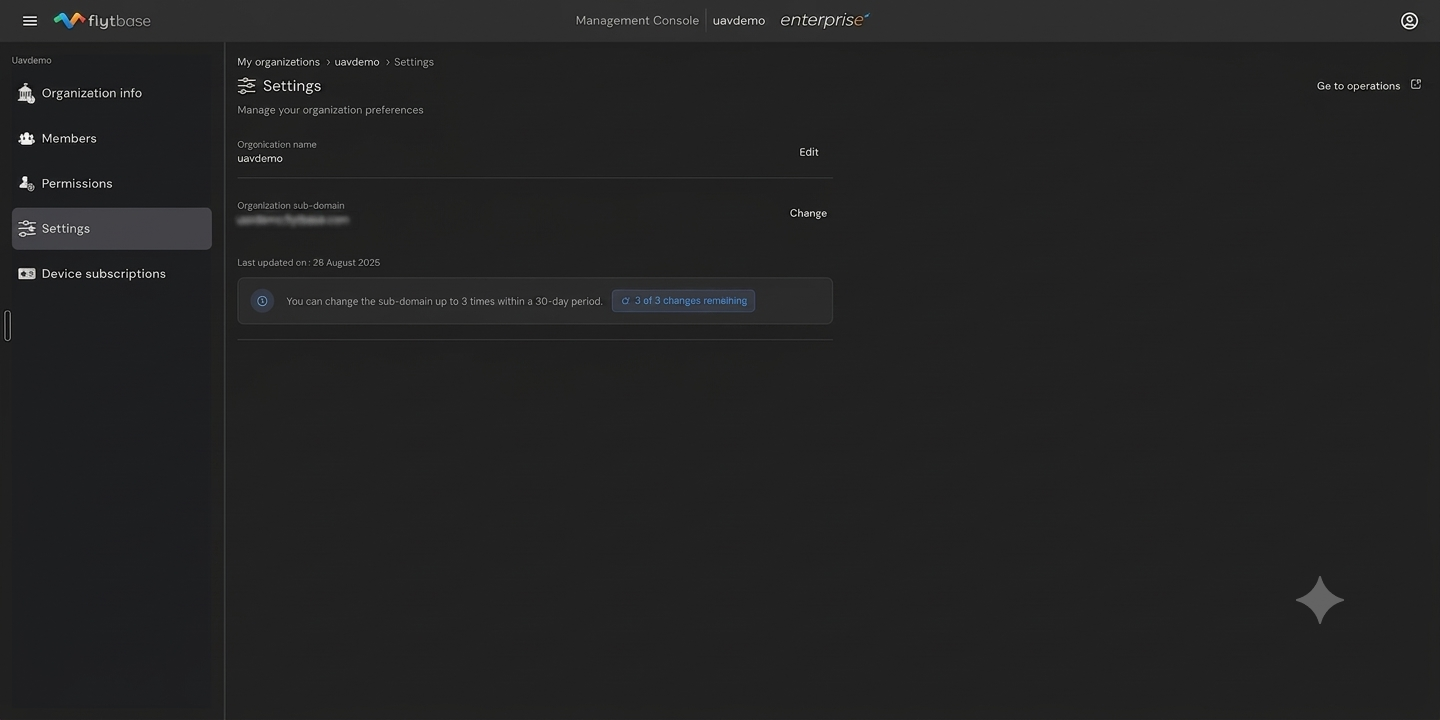
The organization subdomain can only be changed up to 3 times within a 30-day period. Inform the Solution Engineering (SE) team or customer support before changing the subdomain so they can stay updated with the organization URL.
Device Subscriptions
The Device Subscriptions page has two tabs: Plans and Video Viewer Minutes.
Plans
The Plans tab displays all active device subscriptions, including the plan name, description, device name, subscription ID, activation and expiry dates, and associated partner.
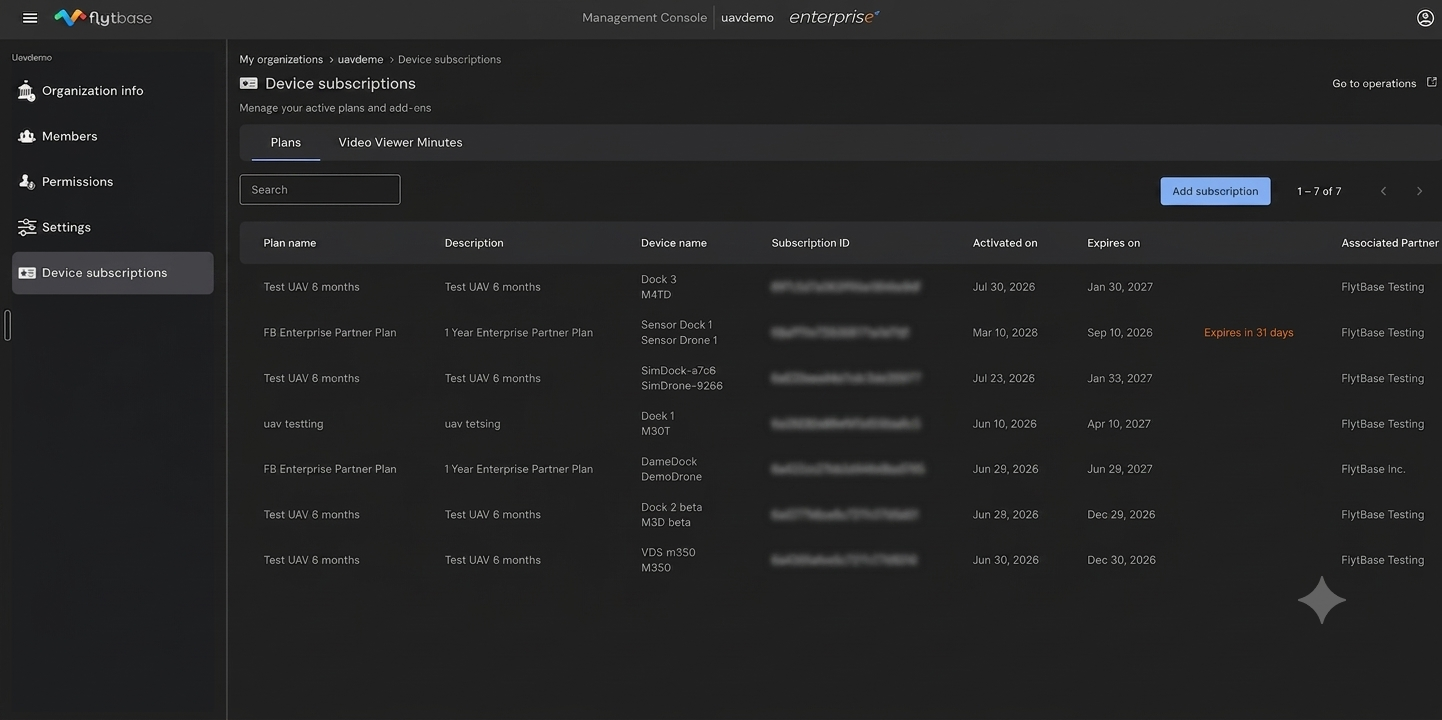
To add a new subscription:
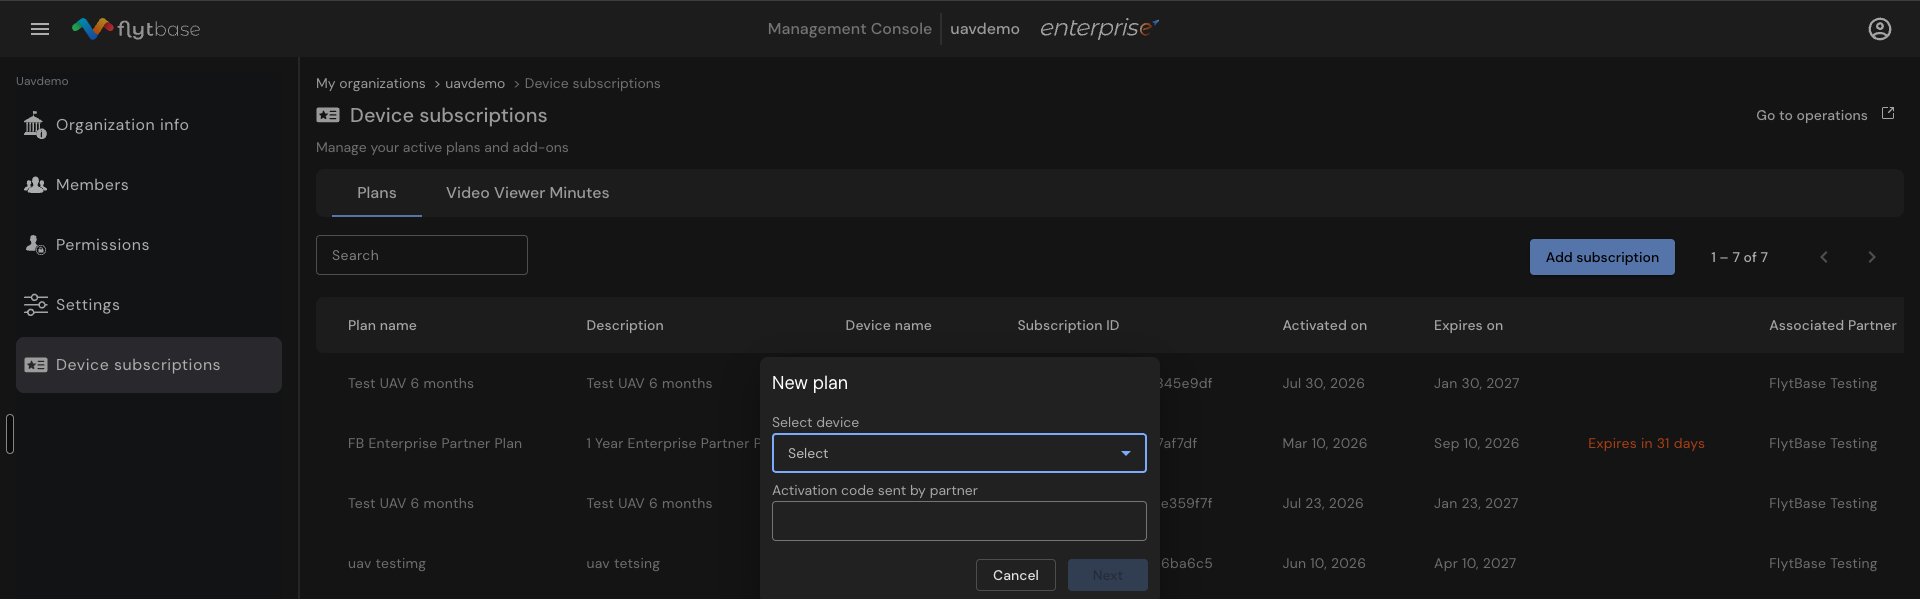
- Click on the Add subscription button.
- Select the device from the Select device dropdown - the dock and drone registered on the platform appear here.
- Enter the activation code provided by the partner.
- Click on Next to activate the subscription for the selected device.
Video Viewer Minutes
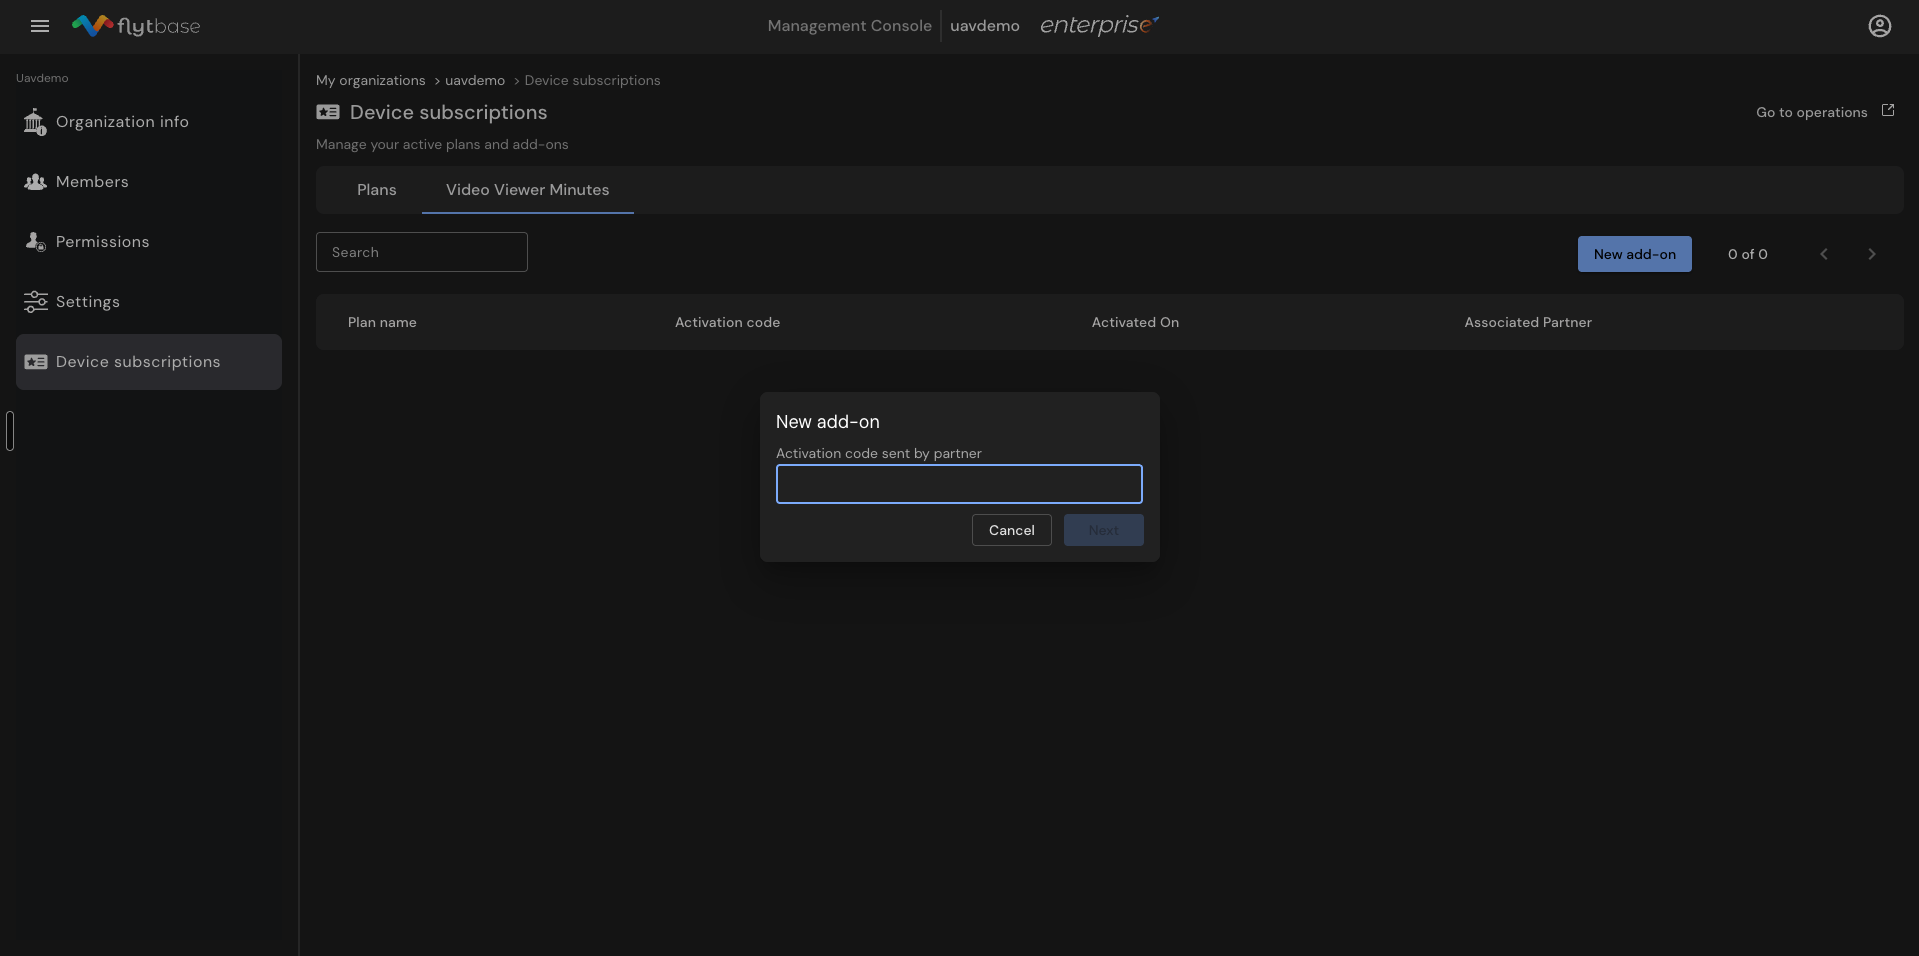
Video Viewer Minutes (VVM) are available as add-ons. An activation code is shared by the partner or directly by customer support.
- Click on the New add-on button in the Video Viewer Minutes tab.
- Enter the activation code sent by the partner.
- Click on Next to activate the add-on.
Once an organization has been established and members have been added, proceed to create a Site on the map. This involves adding devices, missions, and members to the site while implementing selective access controls.
Was this helpful?